byondpro Configuration
& Processing Guide
×
Menu

Action Buttons

 
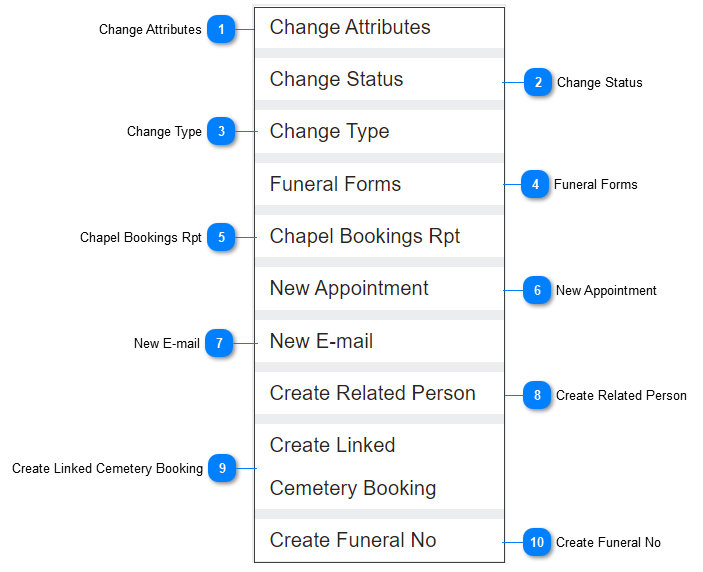
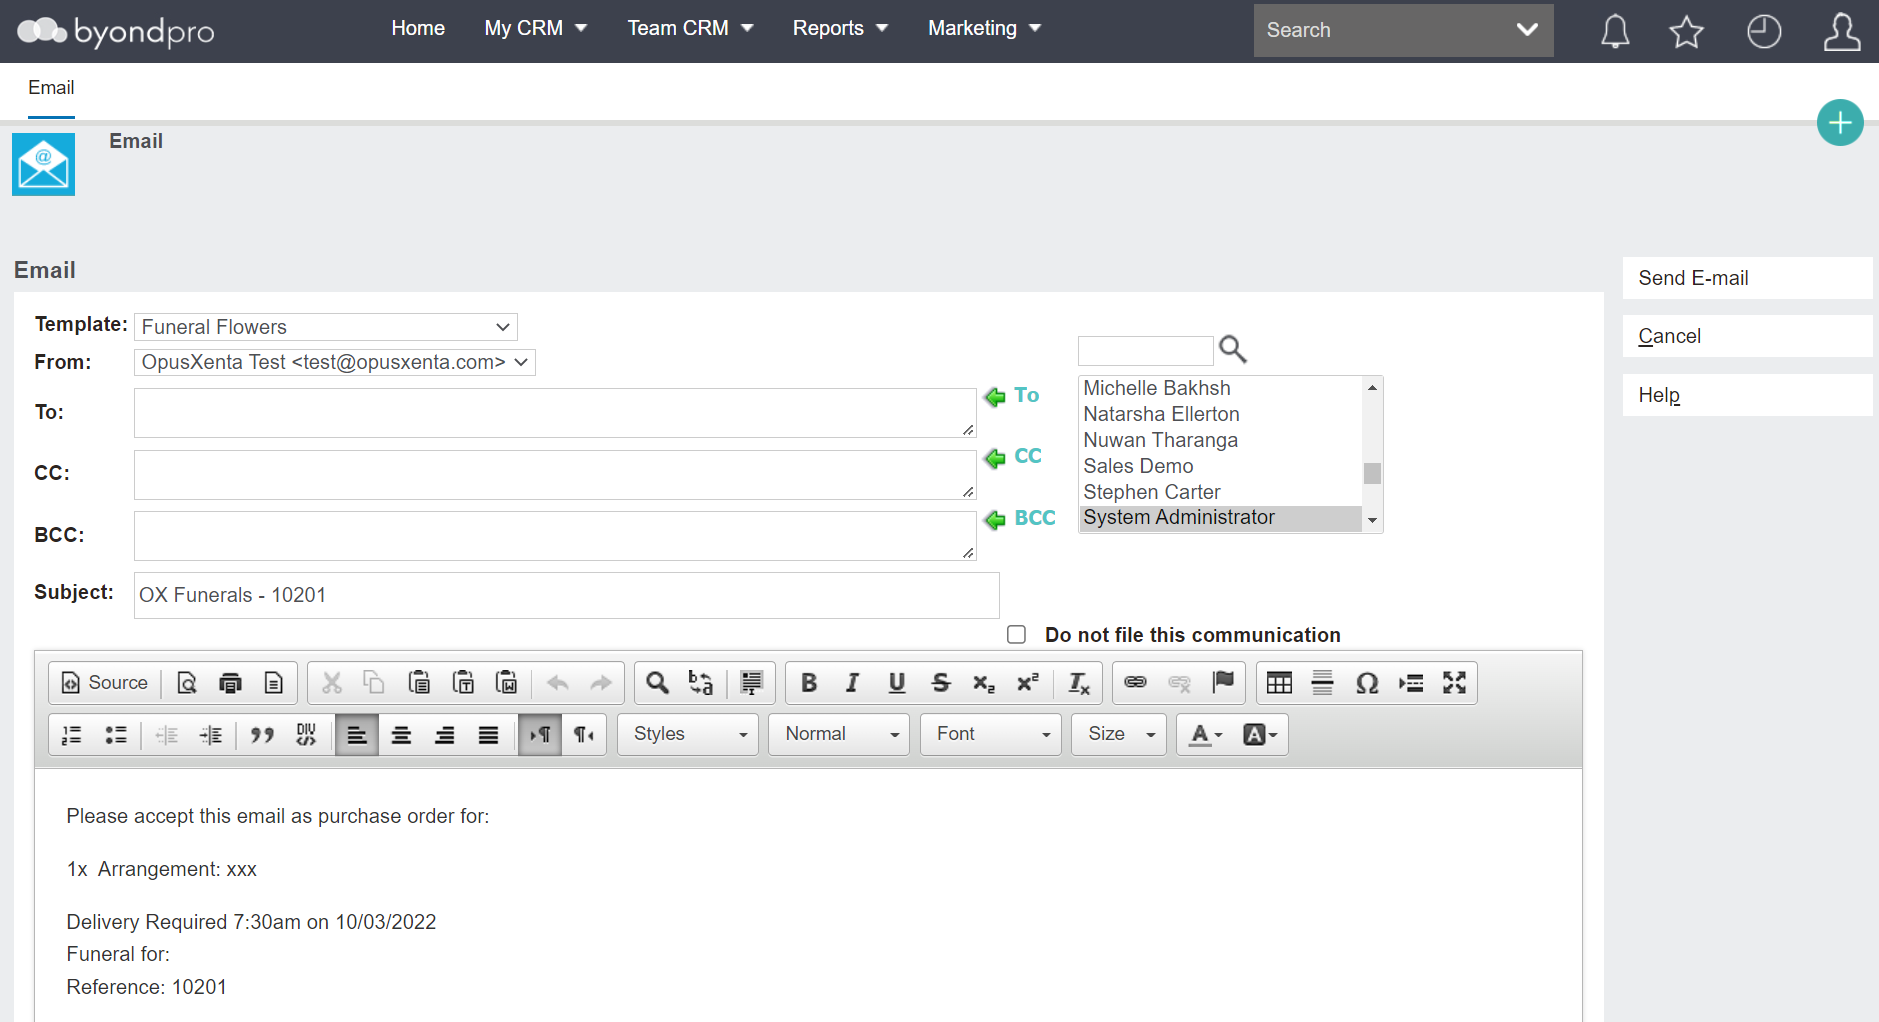
Once the initial booking and first call details are recorded, additional actions can be taken using the Action buttons from the right-hand side of the Summary tab of the Sales & Booking.
 
Depending on your accessibility, some of the actions may not be available and will likely not be required.
 
Those required actions may be completed at different times throughout the funeral arrangement process.
 
Refer to the below for assistance on the purpose and how to complete each action.
 
 
Action Buttons
1

Change Attributes


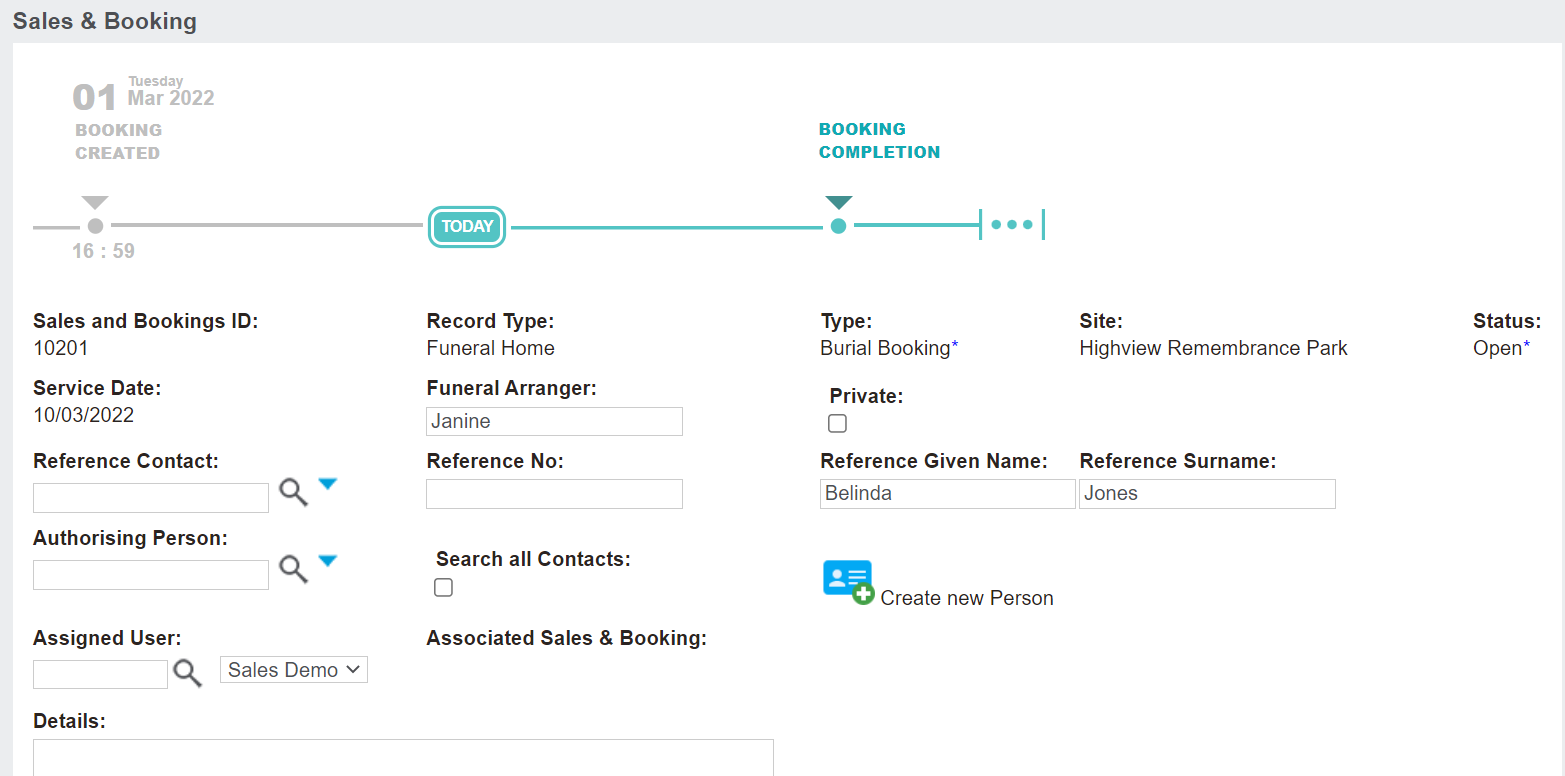
The Change Attributes button places the booking in edit mode.
 
 
1. Change Attributes
 
Users can make changes to the following fields:
 
  •  Funeral Arranger
  •  Private tick box
  •  Reference Contact, Number, Given Name, & Surname
  •  Authorising Person
  •  Assigned User
  •  Details
 
 
You may use this button when you have the paperwork and details for the Reference Contact & the Authorising Person and are ready to add these people as person records in the system starting with the Create new Person button.
 
2

Change Status


The Change Status button will allow users to change the status to completed, for example, when the funeral arrangements are all completed.
 
2. Change Status
 
Select the new status from the selection list.
 
 
Then press the Save button.
 
3

Change Type


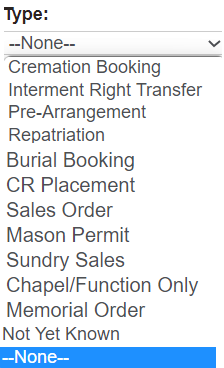
The Change Type button will allow users to change the type of booking. For example, if the type of booking was 'Not Yet Known' at the time of the first call, you would want to update it once it was known.
 
3. Change Type
 
Update the Type from the selection list.
 
 
Then press the Save button.
 
4

Funeral Forms


The Funeral Forms button will allow you to generate customisable reports, such as the First Call sheet and the Personal Effects Summary.
 
4. Funeral Forms
5

Chapel Bookings Rpt


The Chapel Bookings Rpt button allows users to determine if the desired chapel is available at the requested time.
 
5. Chapel Bookings Rpt
6

New Appointment


The New Appointment button allows users to create new appointments to schedule resources and appointments applicable to any funeral arrangements.
 
6. New Appointment
7

New E-mail


Should there be a need to send a new e-mail related to the booking, use the New Email button to draft and send the email.
 
7. New E-mail
 
Users can generate an e-mail to customers or suppliers regarding the funeral arrangements.
 
 
Templates can be saved in the system to make drafting of emails consistent and efficient.
 
 
Once the e-mail is drafted, click the Send E-mail button on the right--hand side of the page.
 
8

Create Related Person


Use the Create Related Person button to generate the related person link which will display on the Related Persons' tab of the booking.
 
8. Create Related Person
9

Create Linked Cemetery Booking


Use the Create Linked Cemetery Booking button if you have byondpro Cemetery Management as well and need to create an associated Cemetery booking.
 
 
9. Create Linked Cemetery Booking
10

Create Funeral No


Use the Create Funeral No button to add a Funeral Number to the booking.
 
 
10. Create Funeral No
 
Should this feature be activated on your byondpro, a message will confirm the Funeral Number has been created successfully.
 
Press OK.
 
 
A new field of Funeral Number will display on the Summary tab of the booking, with a generated number based on the programmed logic.
 
The out-of-the-box configuration will generate a number which includes the year, the site, and the number of booking for the year.
 
This numbering convention can be configured differently by an OpusXenta consultant to meet your Funeral Home's needs. 
 
The online help was created with Dr.Explain