Add an Item
To add a new item individually, click on the plus symbol on the top right-hand side of the page.

Choose New Item.

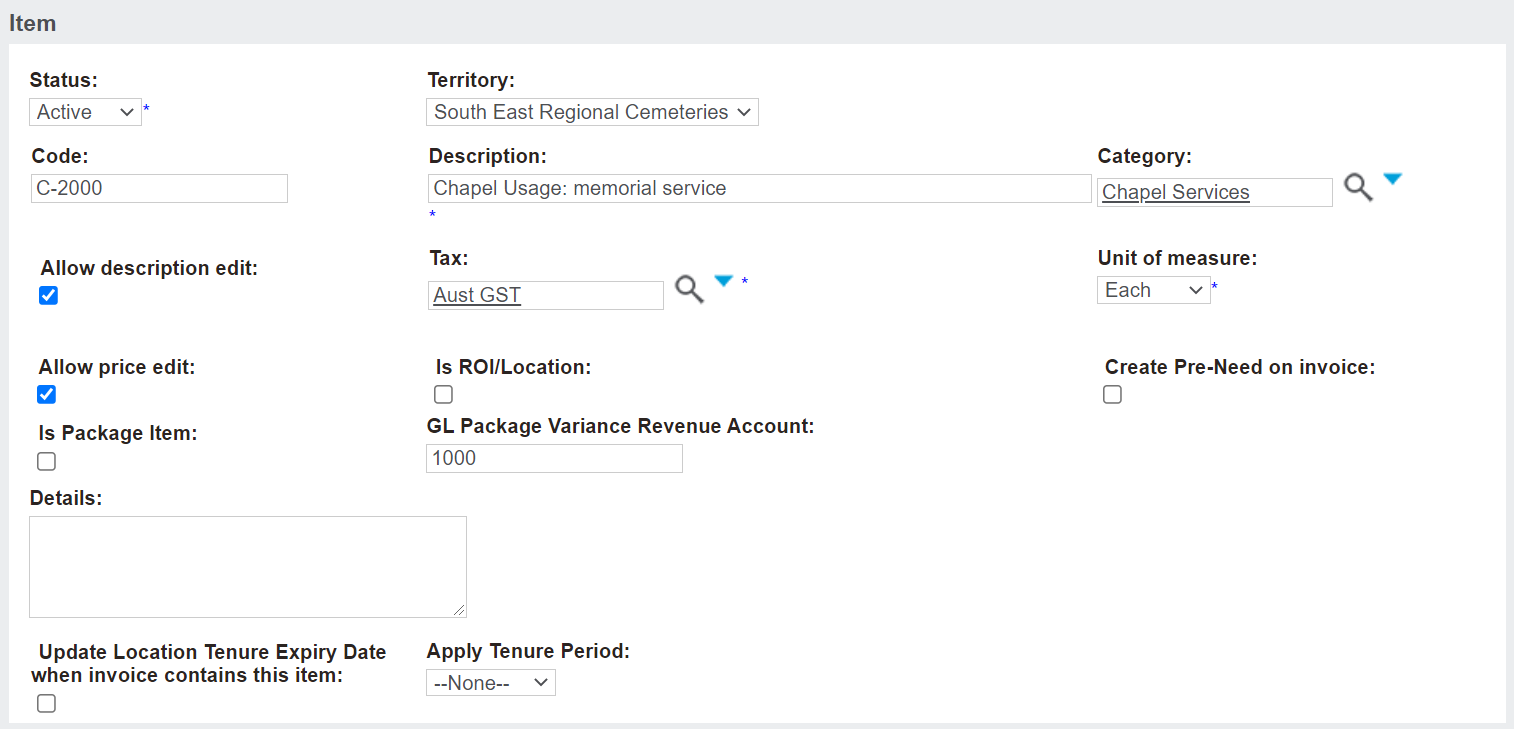
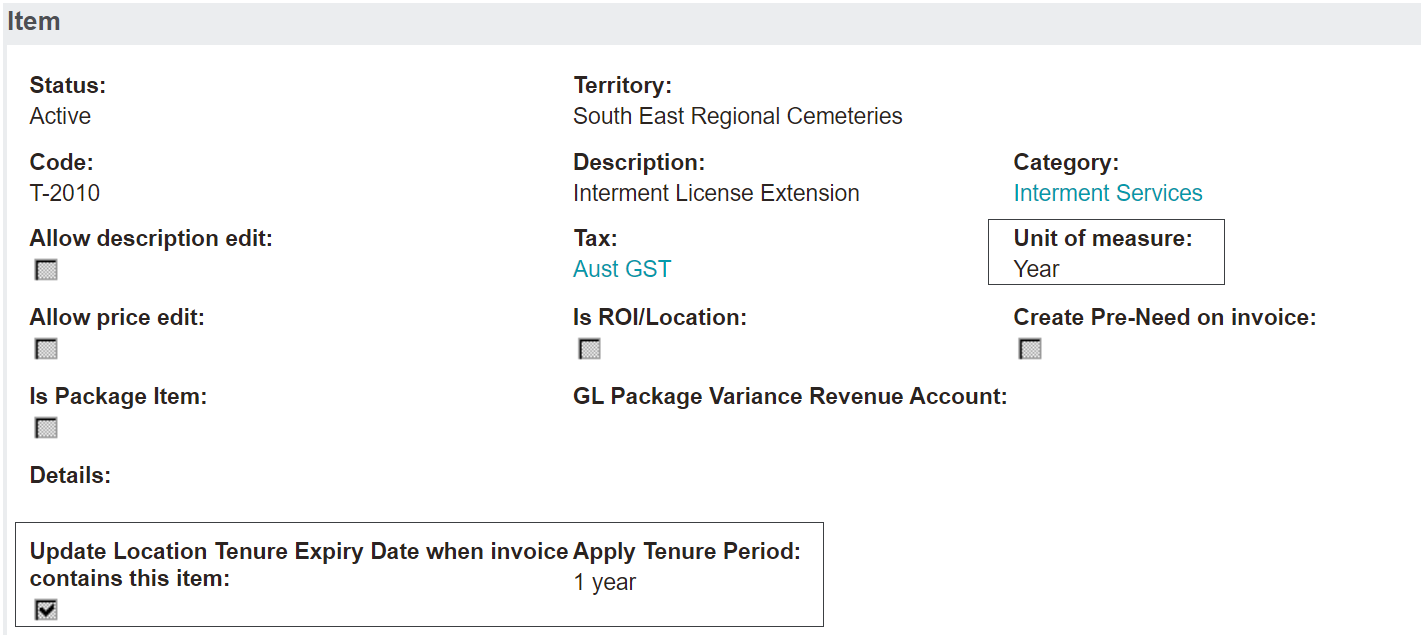
The Status will default to Active.
The Territory field will default to your overarching cemetery trust.
The code is the abbreviated version of the item. We recommend items in your database follow a consistent numbering convention. For an example of how we have the item codes numbered in our Demonstration Database visit the Item Codes (Demonstration Database) section of this guide.
The item Description is how the item appears on quotes or invoices.
If the Allow Description edit tick box is ticked, a user can edit the description in the Sales Order to add more detail to the description of the item on the invoice.
The Category serves as a hyperlink, once saved, to the category the item is linked to and drives the posting of the general ledger transactions.
The Tax field will serve as a hyperlink, once saved, that brings you to a description about which tax code is being applied to this item. As per our example, the tax setup for this item is Aust-GST, which is linked to the tax class of ‘GST inclusive’.
The Unit of Measure field relates to tenure extension items. For items not related to tenure extension, such as our chapel service example, this field will display as Each.
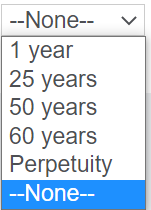
By selecting the unit of measure as year, the Update Location Tenure Expiry Date when invoice contains this item tick box should then be ticked.
Additionally, a selection should be chosen in the Apply Tenure Period field.
By selling the tenure extension in years, a family could extend the tenure expiry by the number of years. This might be particularly important where a cemetery requires a minimum tenure remaining required to accept a booking and have the service /s provided at that point in time.
In our example below, the location will update by 1 year when an invoice contains this item and the sales order includes the location that is being extended.
As another example, if the tenure remaining is three (3) years, and the minimum required for service provision is five (5) years, the family could purchase two (2) or more years of licence extension.
The Allow price edit tick box will allow users to change the price of the item from the invoice screen, if ticked.
In addition to controlling whether the item price can be edited or not on the item record, there is a control on a user's profile, which if ticked allows the individual user, such as a supervisor, to edit the price.
The administrator can edit profiles by visiting Administration > Users.

The Create Pre-Need on invoice tick box allows customers to manage their pre-need transactions by sending all sales of this item to the pre-need table regardless of whether the sale is at-need or pre-need.
Users / consultants should approach this setting with caution and understand the full implications prior to ticking this box.
If advanced revenue recognition is set on the item category, for example ARR On Redemption and the item is ticked in the ‘Create Pre-need on invoice’ field, the item setting prevails and the sale of this item in any circumstance, whether sold as at need or pre-need will go to the pre-need table regardless and will look to the ARR setting and honour that setting.
Where Advanced Revenue Recognition is not switched on and the item setting has the Create preneed on invoice ticked, the setting will send all at-need and pre-need purchases to pre-need. These items will need to be manually taken up / redeemed to recognise the revenue.
Where Advanced Revenue Recognition is switched on, in any circumstance whether the item is sold as at-need or pre-need, all purchases will be processed as pre-need AND will look to the ARR setting and honour that setting. These items will automatically recognise revenue based on the category setting:
-
On invoice
-
On payment in full
-
On redemption
To learn more about this setting, visit the Create Pre-Need on Invoice section of this guide.
Items that are ticked as Is ROI\Location have a few additional elements to them, which will be reviewed in the ROI \ Location Items section of this guide.
Additionally, items that are marked as Is Package Item have some further elements to be explored in the Package Items section of this guide.
Once all the fields are completed, press Save on the right-hand side of the page.

Once the item is created, you will need to add at least one price so that the item can be used in a sales transaction.