Header
The header follows onto every tab as the user navigates through the Sales & Booking record. It provides the user basic details based on the information completed when the booking was made and updates as changes are made to the booking.
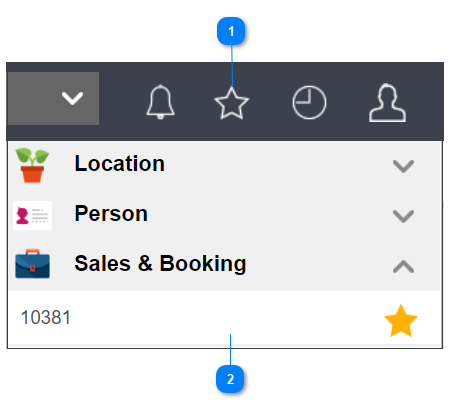
Mark the booking as a favourite, by clicking on the star in the header and it will turn yellow.
Users can find their favourite bookings by:
|
Clicking on the star on the toolbar.
|
|
|
Then, locating the booking under the Sales & Booking header.
|
|
The Status on the header will update throughout the booking process as relevant changes are made to the booking.
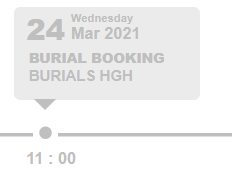
Timeline
Below the header, a visual timeline of core appointments (i.e. Chapel service, Burial service) display. The timeline is linked to the Communications tab of the Sales & Booking.
As different events are added to the booking, the user will see them displayed.
Today appears on the timeline and once events have passed, they will appear grayed out. Future events are in blue.
Appointments can be edited by clicking directly on the appointment, making the change, and pressing save.
Alternatively, users can navigate to the Communications tab to access the appointments.
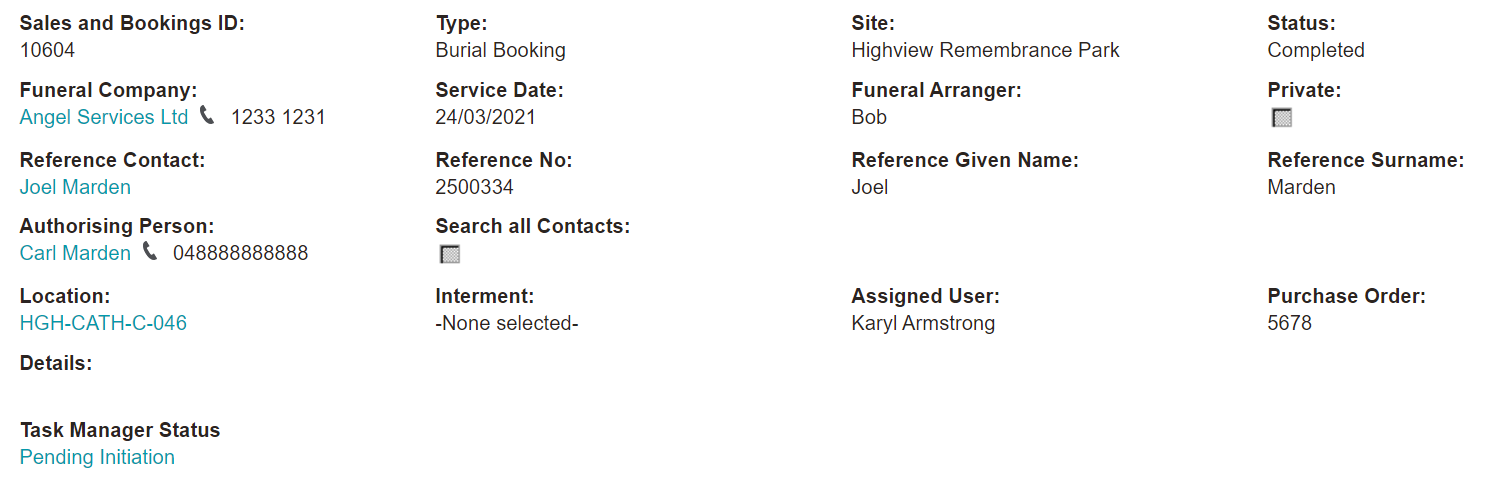
Sales & Booking Information Block
Below the timeline is the Sales & Booking Information block. Details are completed upon creating the booking and will be updated as a user makes changes to the booking.
The Funeral Company, Reference Contact, Authorising Person, and Location all serve as hyperlinks to the appropriate records.
If Task Manager is in use, clicking on the status will bring the user to byondcloud Task Manager to view details. The status will start as pending initiation and as updates are made in the application, the status will change.
Action Buttons
On the right-hand side of the summary tab are the action buttons that can be used to make changes to a booking, generate documents, send emails to customers, view reports and create appointments.
If a change is required to the fields within the Sales & Information Block, clicking on the Change Attributes button will allow the user to edit these fields. The Sales and Booking ID, Type, Site, and Status cannot be edited in this mode.
If a change is required to the status of the booking, such as marking the booking as completed, the Change Status button will allow the user to do so.
Should the incorrect booking type be chosen, the type can be changed using the Change Type button.
Please note that if appointments exist on the booking, for example, a Burial Appointment on a Burial Booking, and the type of booking is being changed to Cremation Booking, a warning message is triggered to alert the user that appointments may need to be changed, such as the burial appointment in our example.
Throughout the booking process, a Booking Confirmation can be sent to the funeral director, for example, to notify of appointments being booked or changes that have been made to the booking.
By clicking on the Application Documents button, the user can send various documents related to the right of interment application.
Before creating an appointment, use the Chapel Bookings Rpt to determine if the desired chapel is available at the requested time.
Clicking on New Appointment will allow the user to create the appointments for chapel, burial, or functions services.
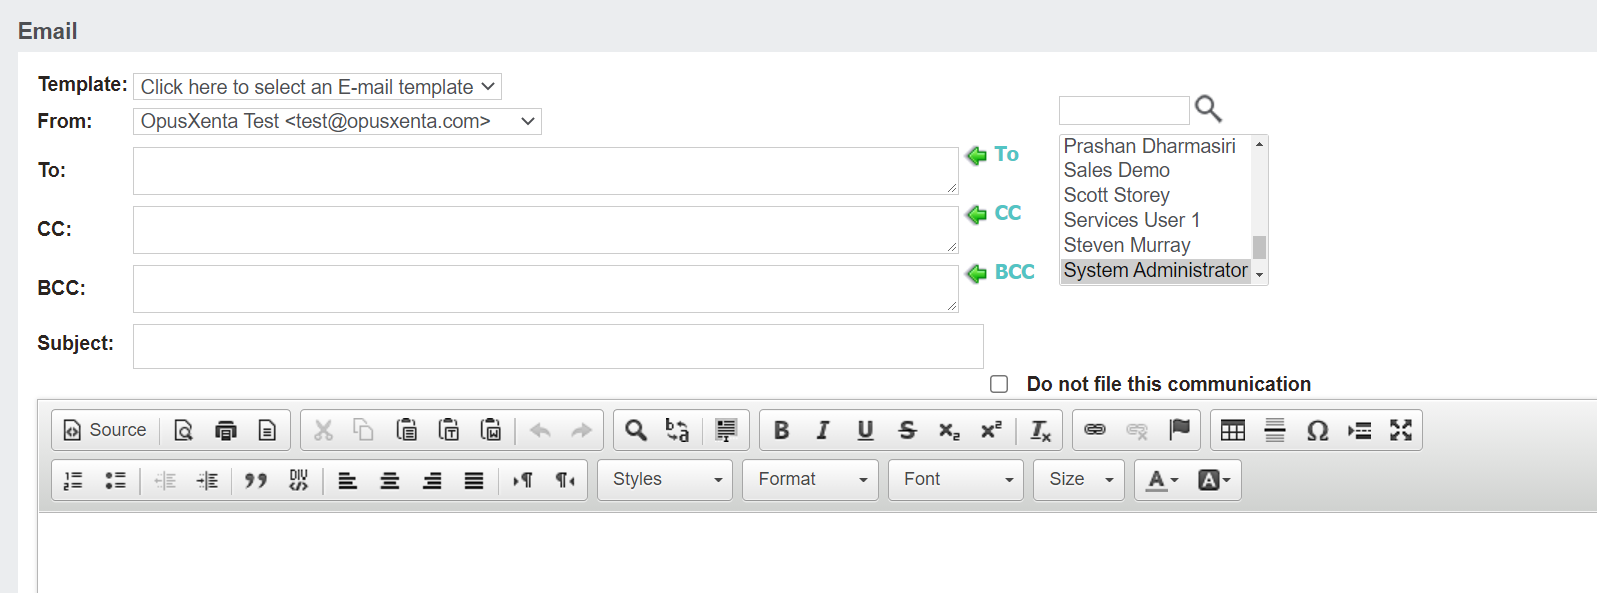
Should there be a need to send a new email related to the booking, use the New Email button to draft and send the email.