To add a new area of the cemetery, visit the Areas tab of the Site record.
On the right-hand side of the page, press the New button.
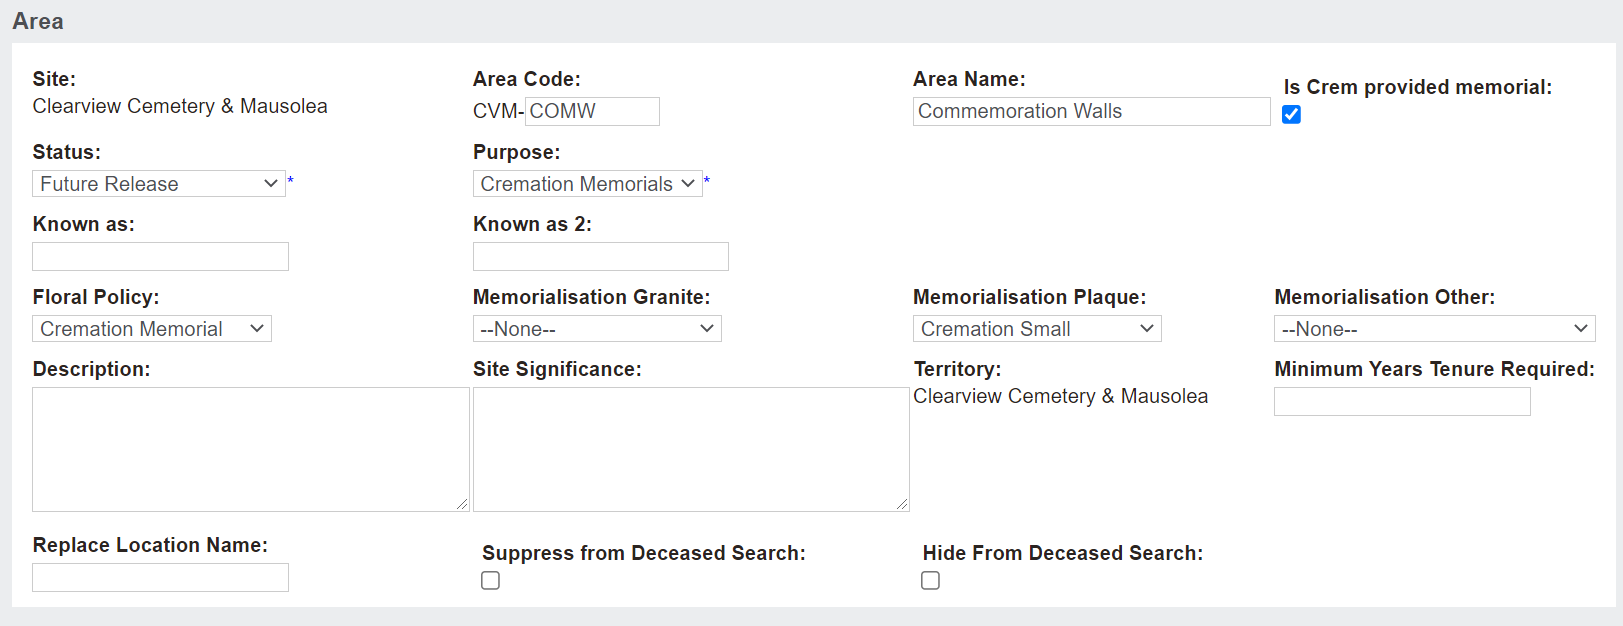
Complete the fields as necessary.
The field of Site will auto populate with the site record you were on when you pressed new.
Type in the Area Code and Area Name of the new area.
For example, we are currently adding the Commemoration Walls, so we will add the area code of COMW and Commemoration Walls in the name field.
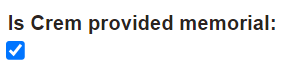
The tick box labelled Is Crem provided memorial should be ticked for a temporary memorial for the storage of cremated remains, such as a reflection wall where the cremated remains may be stored while the family decides what they want to do with the remains.
The family can visit and pay their respects during this time and by the end of the time period they are held for, the family might inter the cremated remains in a permanent location in the cemetery.
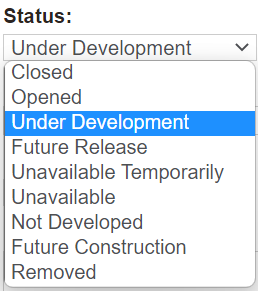
In the Status field, select from the drop-down list.
|
Open
|
Area can currently be used
|
|
Closed
|
Area no longer has available locations
|
|
Not Developed
Under Development
Future Construction
Future Release
|
A new area of the cemetery, not quite ready for sale or interment.
Locations in these areas can potentially be sold for pre-need situations, however, are still in the process of being released.
|
|
Unavailable Temporarily
|
An incident, such as storm, or beautification works have made the area not available for a short time.
|
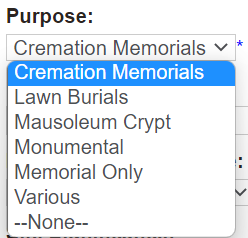
From the Purpose field, select the kind of memorials this area houses.
Use the Known As fields if cemetery staff or visitors to the cemetery use a different name for the particular area than the more formal name provided in the area name field.
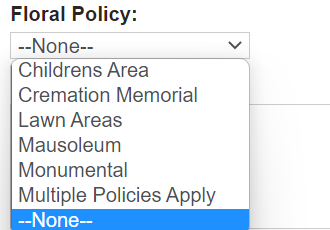
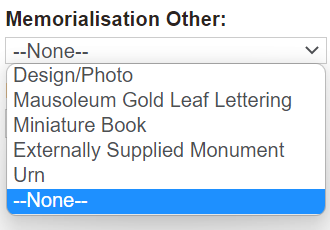
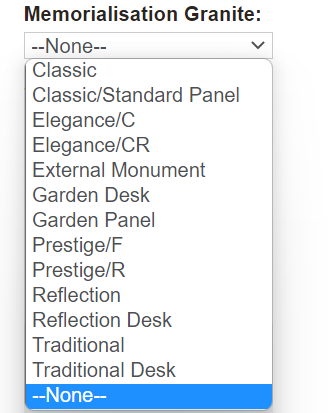
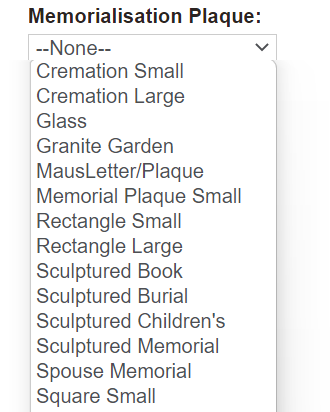
The fields of Floral Policy, Memorialisation Granite, Memorialisation Plaque and Memorialisation Other may be used if you have policies about the flowers, granite and plaques of the memorials in that particular area.
These fields could be a way to flag if there was only a particular style of granite allowed in this area to keep a uniform approach.
A Description can be added, along with the Site Significance.
Be sure to add in the minimum number of years tenure can be applied for in the Minimum Years Tenure Required field.
If the tenure for locations in this area is for perpetuity, simply enter in the number 99.
If using the Decaesed Search functionality on your websites, you can also choose to suppress or hide the area from the search, if required.
Once completed, press Save on the right-hand side of the page.
The new area will now display.
Should you want to record Land and Construction costs to the area at this time, press Change on the right-hand side of the Summary tab of the Area record.
In the Cost Information Block, type in the values in the Cost - Land and Cost - Construction fields.
Then, press the Save button again.