Managing Transfers
In byondpro, users can complete a search for Transfers and access the Transfers tab directly from the Transfers button on the home screen, rather than navigating via the Sales & Booking.
To complete a search, click on the Transfers tile from the dashboard.
Alternatively, click on the arrow next to search on the Toolbar. Then select the Transfers option.
Both options will take you to a search screen specific to Transfers.
Use the search screen fields to complete a search for transfers.
You can use some or all fields.
In our example, below, we selected 'None' in the Assigned To field, so that we can assign any transfers for the day.
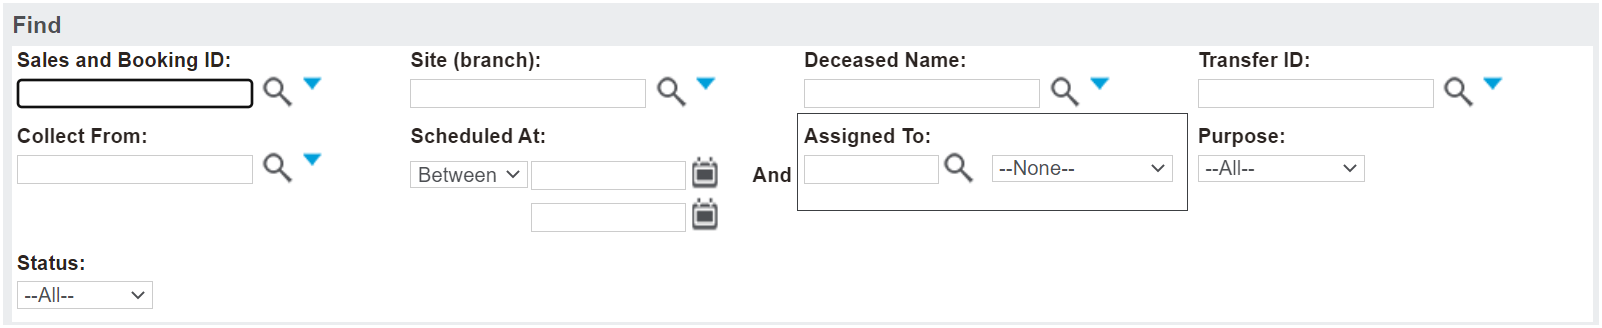
Alternatively, you could select 'Current User' in the Assigned To field to locate any transfers which are assigned to yourself.
Once you have populated the required fields, choose the Find button.

All transfers which meet your selected criteria will display below, with the following:
-
A hyperlink to the Sales & Booking
-
A hyperlink to the Deceased record
-
The Deceased ID which serves as a hyperlink to the Transfers tab of the Sales & Booking
-
A hyperlink to the Transfer
-
The Scheduled At date & time
-
The Collect From details
-
The Transfer To details
-
The Assigned To person
-
The Purpose of the transfer
-
The Status of the Transfer
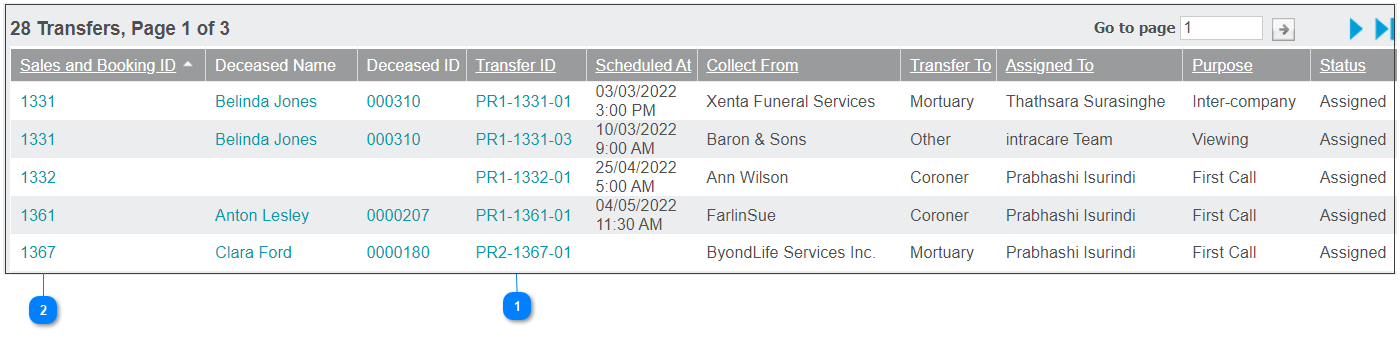
Alternatively, to access the transfer from within the Sales and Booking, select the Sales and Booking ID hyperlink and navigate to the Transfers tab.
|