Inline Customisation / Field Changes
Please speak with your OpusXenta consultant prior to making any changes to discuss the possible consequences of the changes made.
If you are new to working with fields on screens, we suggest using inline customisation.
There are also a few options to consider before making any changes, particularly whether to hide fields or remove them.
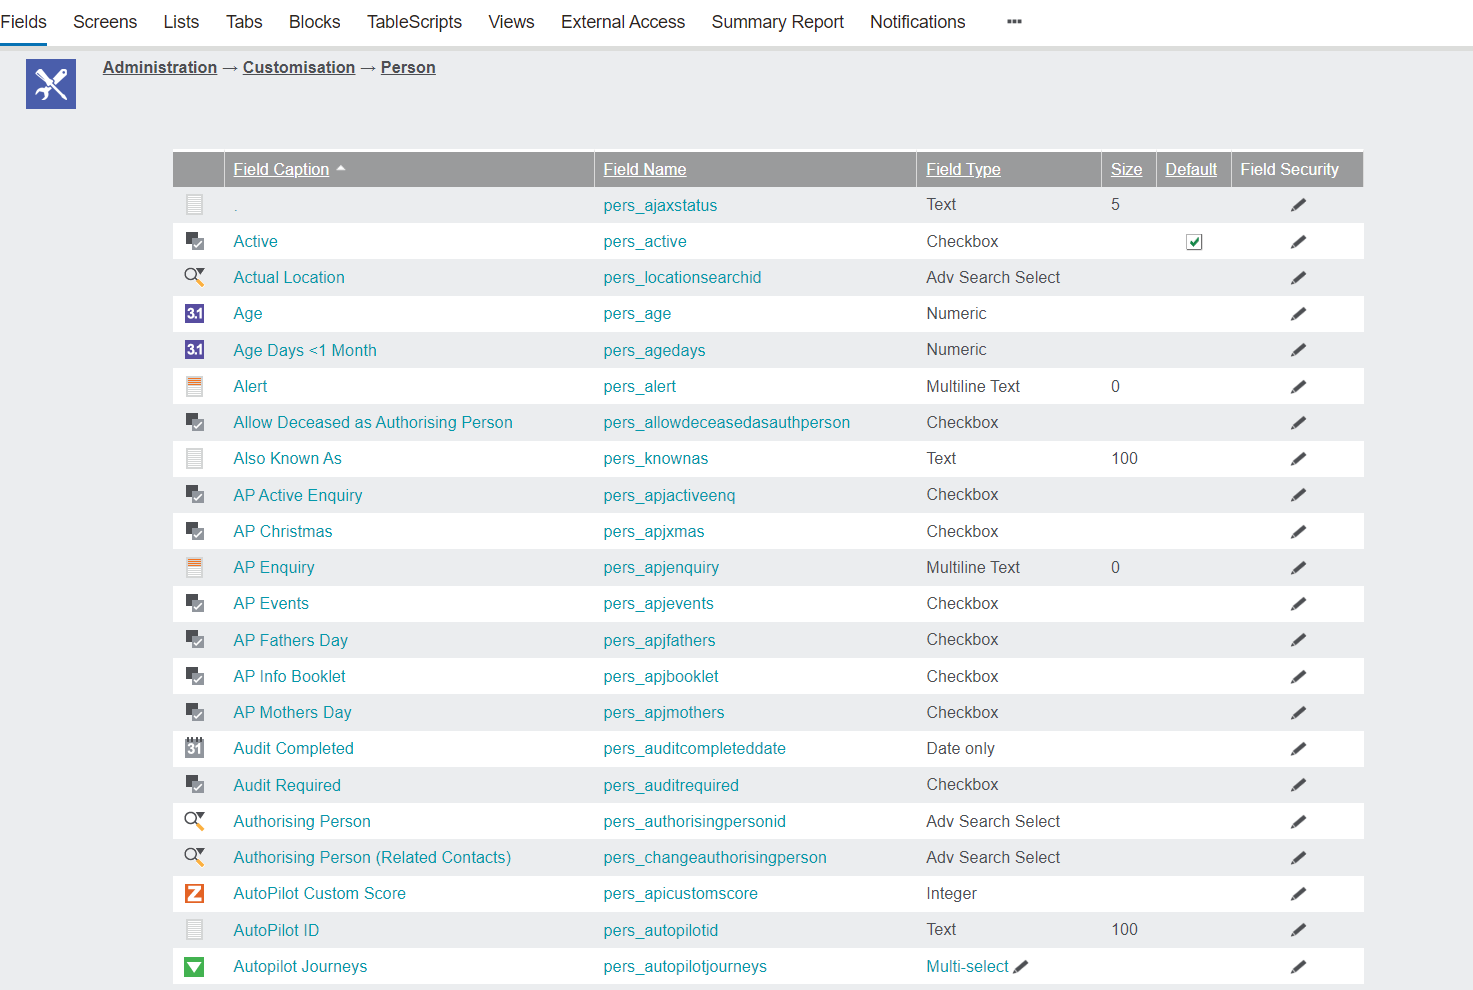
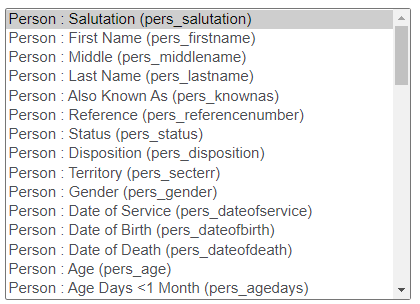
Rather than working from a complete list of all possible fields you could use the inline customisation functionality to help identify which fields have actually been placed on the person record screen.
The screen shown below, displays all possible fields that can be used on the person record. By switching on inline customisation you can check the screen fields that are in use and their placement on the screen.
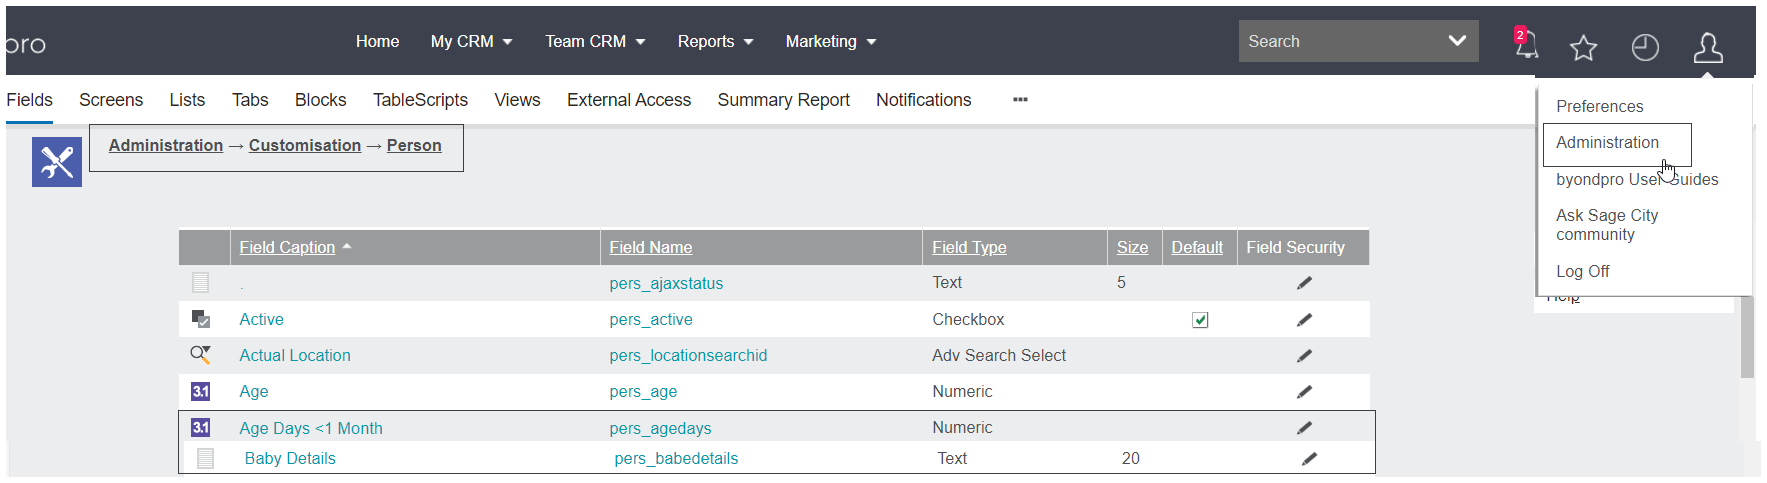
Navigate to Profile Menu -> Customisation -> Person menu
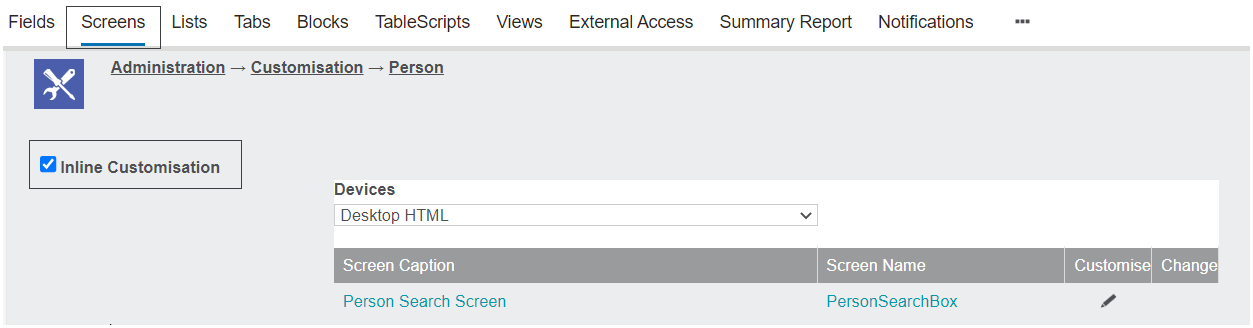
On the Screens tab, tick the box for Inline Customisation.
Now, go into a person record and click on the Customise Screen link.
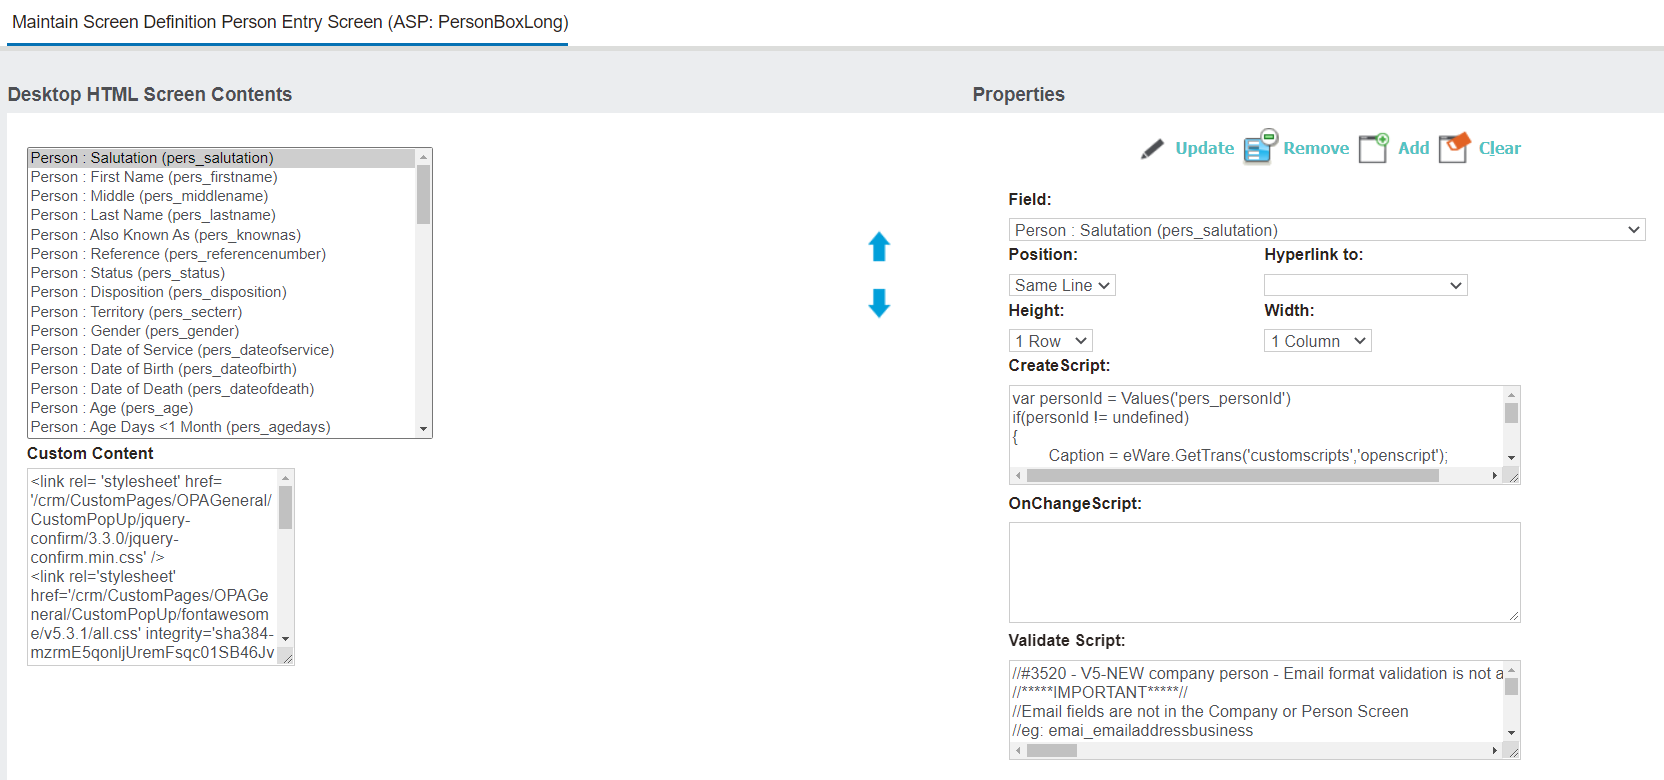
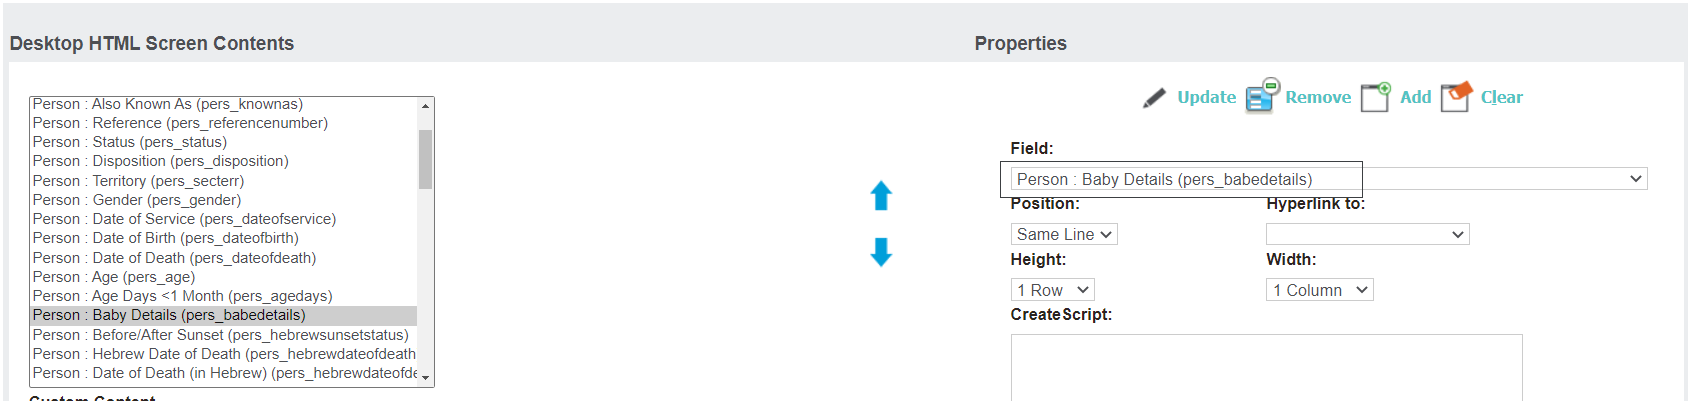
A pop-up window with the field list for this screen will appear, as shown below.
On the left of the screen is the list of all fields in use.
Their placement on the screen is shown in the position field on the right of the screen.
You will also see on the right of the screen is the Field drop down list, this is the full selection list of fields where you can choose a field to add or highlight a field to remove.
For this example, we will look at removing or hiding the field Person: Baby Details (pers_babedetails) and adding the field Age of Baby (pers_agebaby).
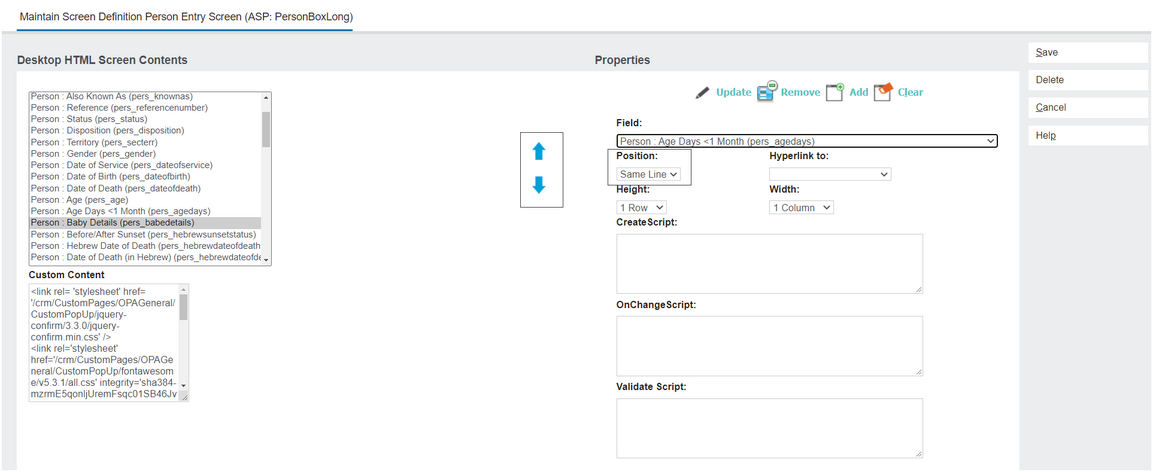
It’s important to take note of where the field you are removing sits in the list on the left.
If you are sure there will be no ongoing impact, you can delete this field or alternatively populate the Create Script box with Hidden=true.
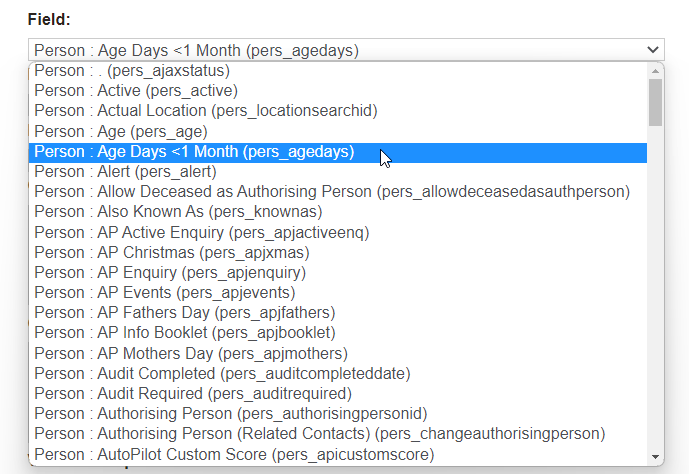
Then choose the new field from the drop-down Field list.
Select the position as the same line or new line depending on where you would like the field placed on screen.
Then use the arrows to position the field in the list on the left in the same place you removed the previous field from,.
Choose the Add Button and Save.
If you do not wish to proceed with the changes, simply select the Cancel button.