Creating a Cremation Booking
As shown in the Burial Booking section of this guide, there are a couple of ways to create a Sales & Booking :
-
Click on the Plus symbol on the top right-hand side of the page.
-
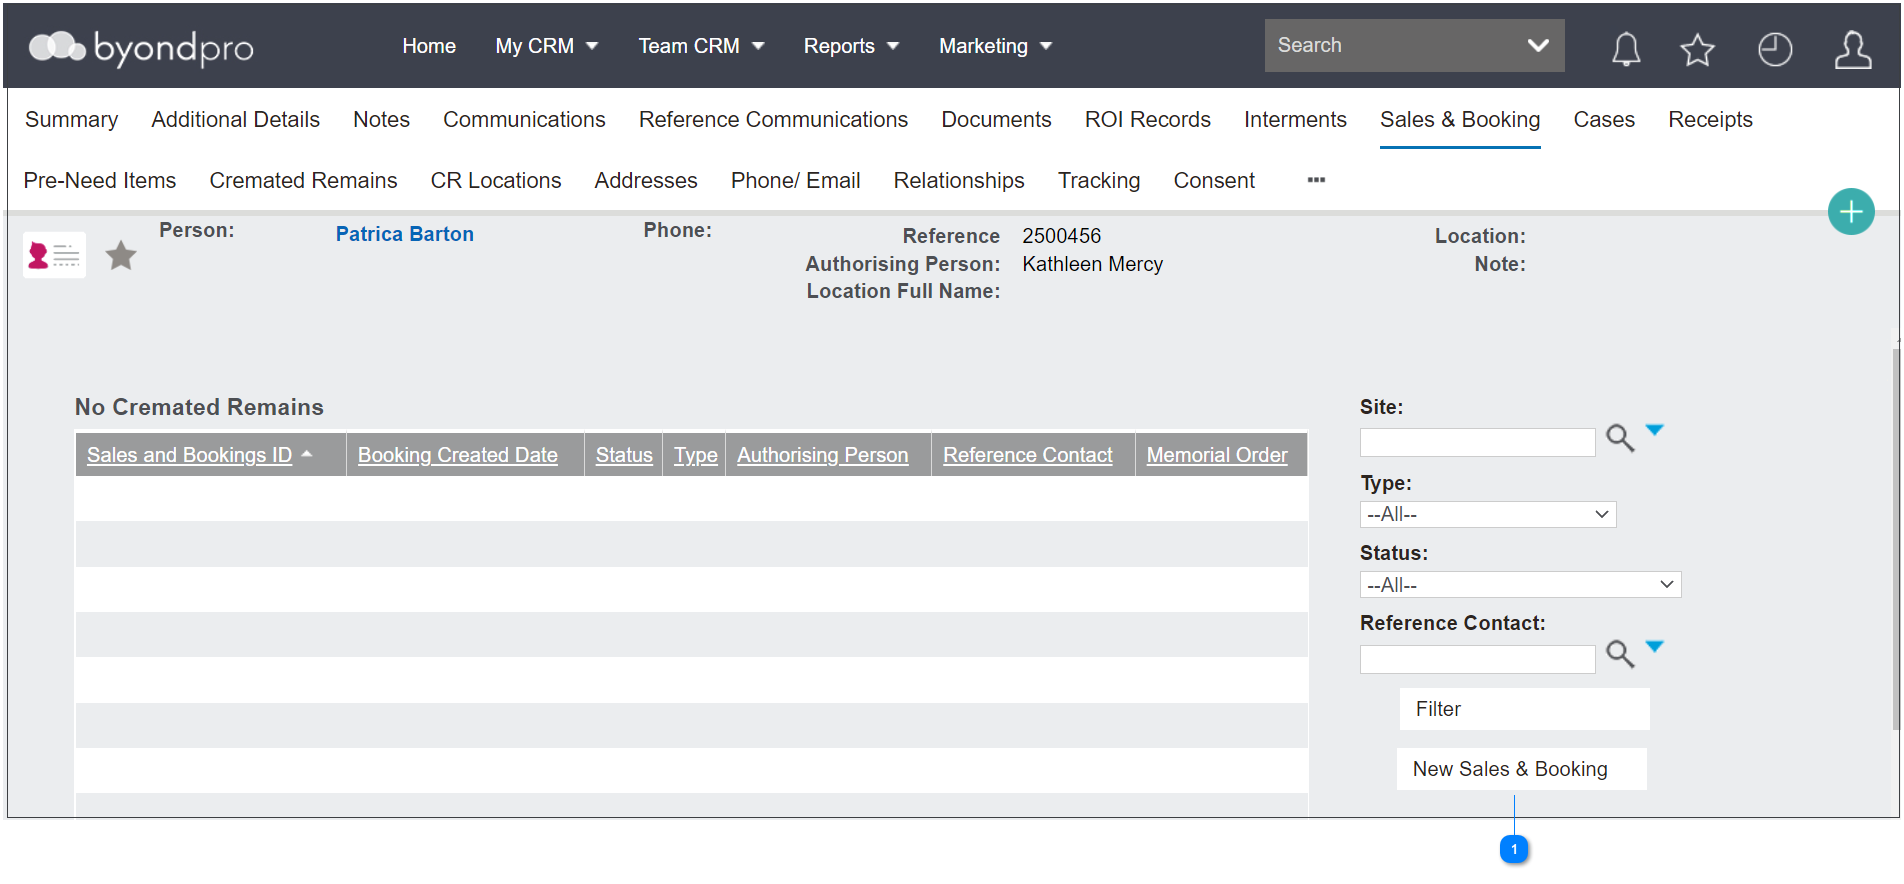
If the person record /s to be used in the booking is already in the database, navigate to the Sales and Booking tab of the person record.
For the first option:
|
Click on the Plus symbol on the top right-hand side of the page.
If the person record /s required for the booking (authorising person and reference contact) are not already in the database, they can be created while capturing the booking details.
|
|
|
Next, choose New Sales & Bookings from the drop-down list.
|
|
For the second option:
|
Click on the New Sales & Booking button on the Sales and Booking tab of the person record.
This action will populate the Sales & Booking Reference Contact field with the person record.
|
|
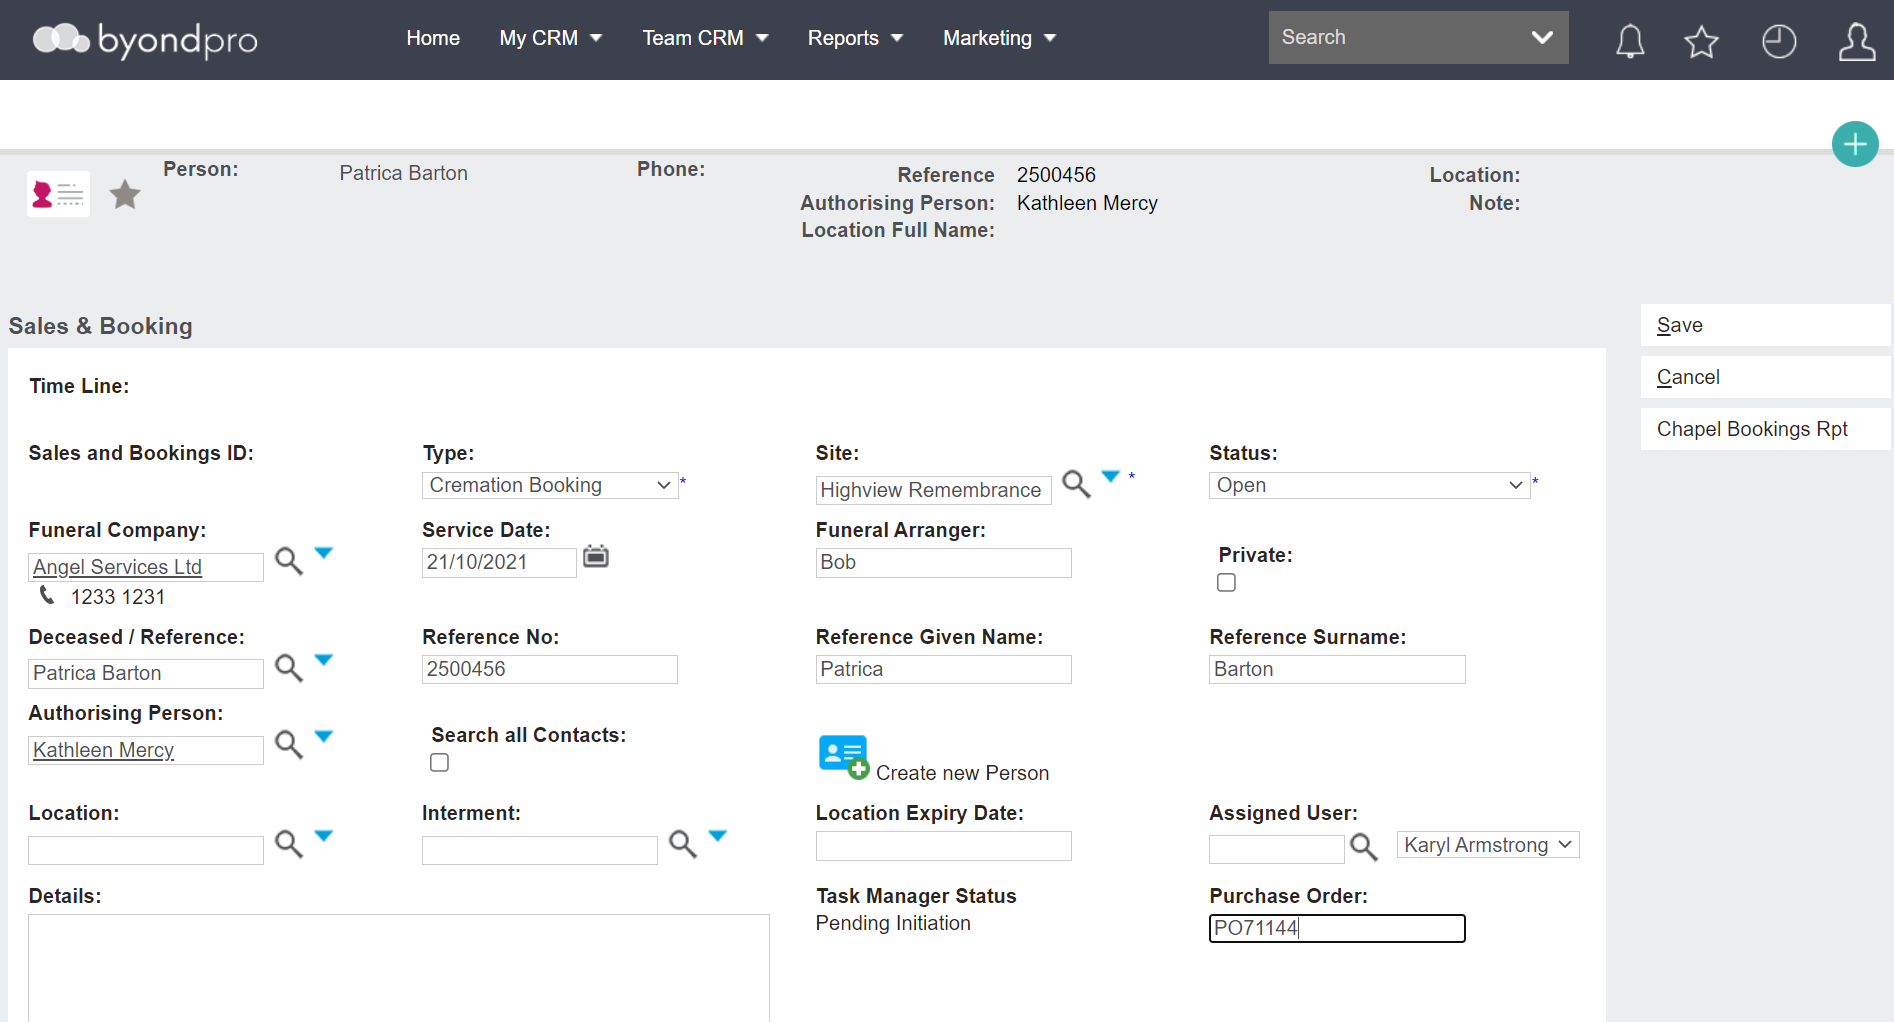
Complete the fields with as much information as possible.
The fields and what is required to complete at the start may vary based on each customer’s database, their internal processes, and the information the user has at the time of creating the booking.
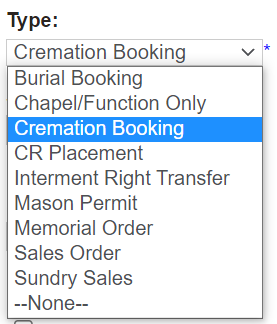
In the scenario of cremation bookings, a user would choose Cremation Booking from the drop-down selection list in the Type field.
The Site field will be the site the cremation is to take place in. Many cemeteries manage multiple sites and it is important that the booking is linked to the correct site, as this field cannot be changed once saved.
The Status will auto-fill as open and throughout the process, users will change the status as necessary based on their internal processes.
The Funeral Company field is for the funeral company arranging the booking. Cremation bookings in Australia are made directly between the funeral company and the cemetery / crematorium. Users can leave this field blank if no funeral company is involved in the booking.
Additionally, users can add the name of the person arranging the service /s from the funeral company in the Funeral Arranger field.
The Service Date field is a required field and is the date of the cremation.
Reference Contact & Authorising Person
-
If the Reference Contact and Authorising Person are already added into byondpro, these records can be added to the booking now.
Once the person record is added to the reference contact field, users can add the authorising person in this field. However, only records linked via a relationship will display when the magnifying glass is selected.
If records are not linked, tick the Search all Contacts box to expand the search across the whole database.
-
If the records are not added into the database at the time of creating a booking and the user has the information to create the records now, the records can be added by choosing the Create New Person button.
-
If the reference contact is not in byondpro and the user does not have the required information to add these records at this time, simply type the name of the reference contact in the Reference Given Name and Reference Surname fields. This information can be updated at a later stage.
Here at OpusXenta, we like to refer to this as a Quick Capture booking, or a booking created quickly with the sole purpose to 'capture' the appointment times. Remaining details can then be added to the booking as they are received.
Location
The Location field would be the location the reference contact is to be interred in, if applicable.
-
If the Reference Contact or Number is selected and the reference contact is already linked to a location (i.e. the rights to a location were purchased, pre-need), it will prefill from person / interment records.
-
If the user has found the location prior to creating the booking and has the location open on another tab, they can copy the location code from the location record and paste the code in this field. Remember to lock in the location by choosing the magnifying glass.
-
If the user would like to find a location at the time of creating a booking, they can use the Search Select fields to find a location at this stage.
-
A location does not need to be added to the booking at this time. The location can be added after saving, by choosing the Change Attributes button on the summary screen once saved.
-
If the rights to the location are being sold in this Sales & Booking, users can send the Application documents to the family to complete from the Sales & Booking record, once saved.
For our booking the family have not indicated yet whether the cremated remains will be collected or placed in a memorial for cremated remains and so the location field has been left empty.
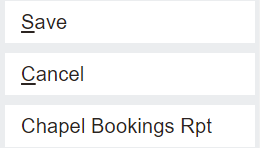
Once all known information is added, choose Save on the top right-hand side of the page.
At any stage of creating the booking, a user can press Cancel on the right-hand side of the page to stop creating the booking.
Additionally, users can click on the Chapel Booking Rpt button to check availability of the chapels when creating the booking.