Create Incident
From the New Case screen, click Category and select Incident.
The screen alters including required Case Details fields.
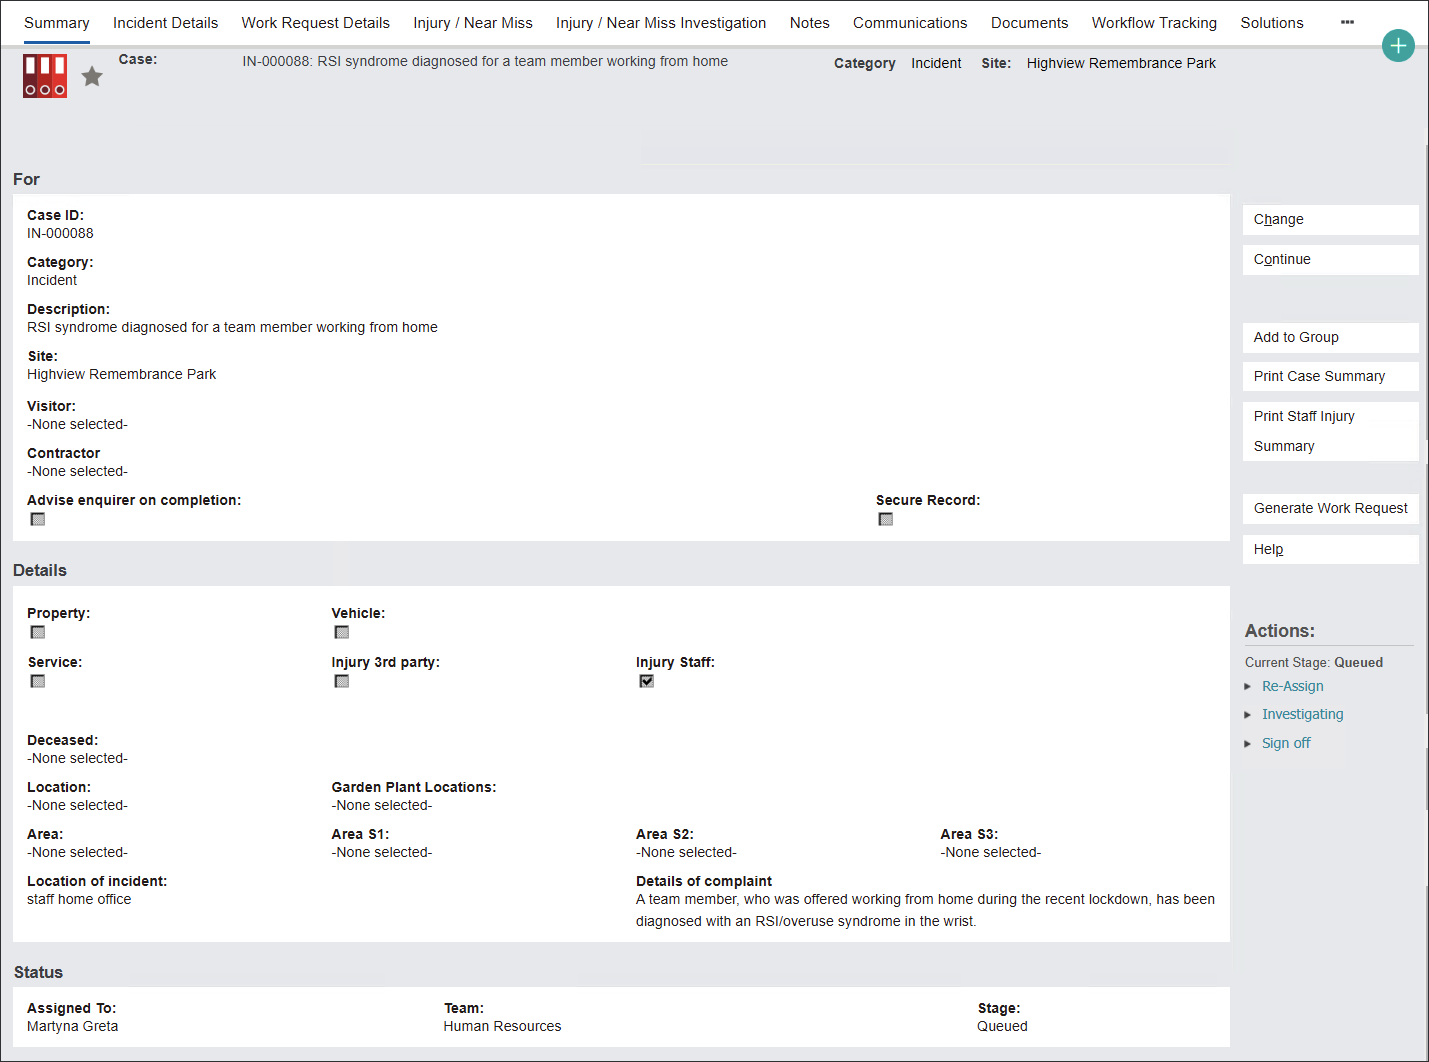
The Incident record uses the same screen as the Client Feedback, however it's altered to capture information regarding potential damage/injury to people or facilities.
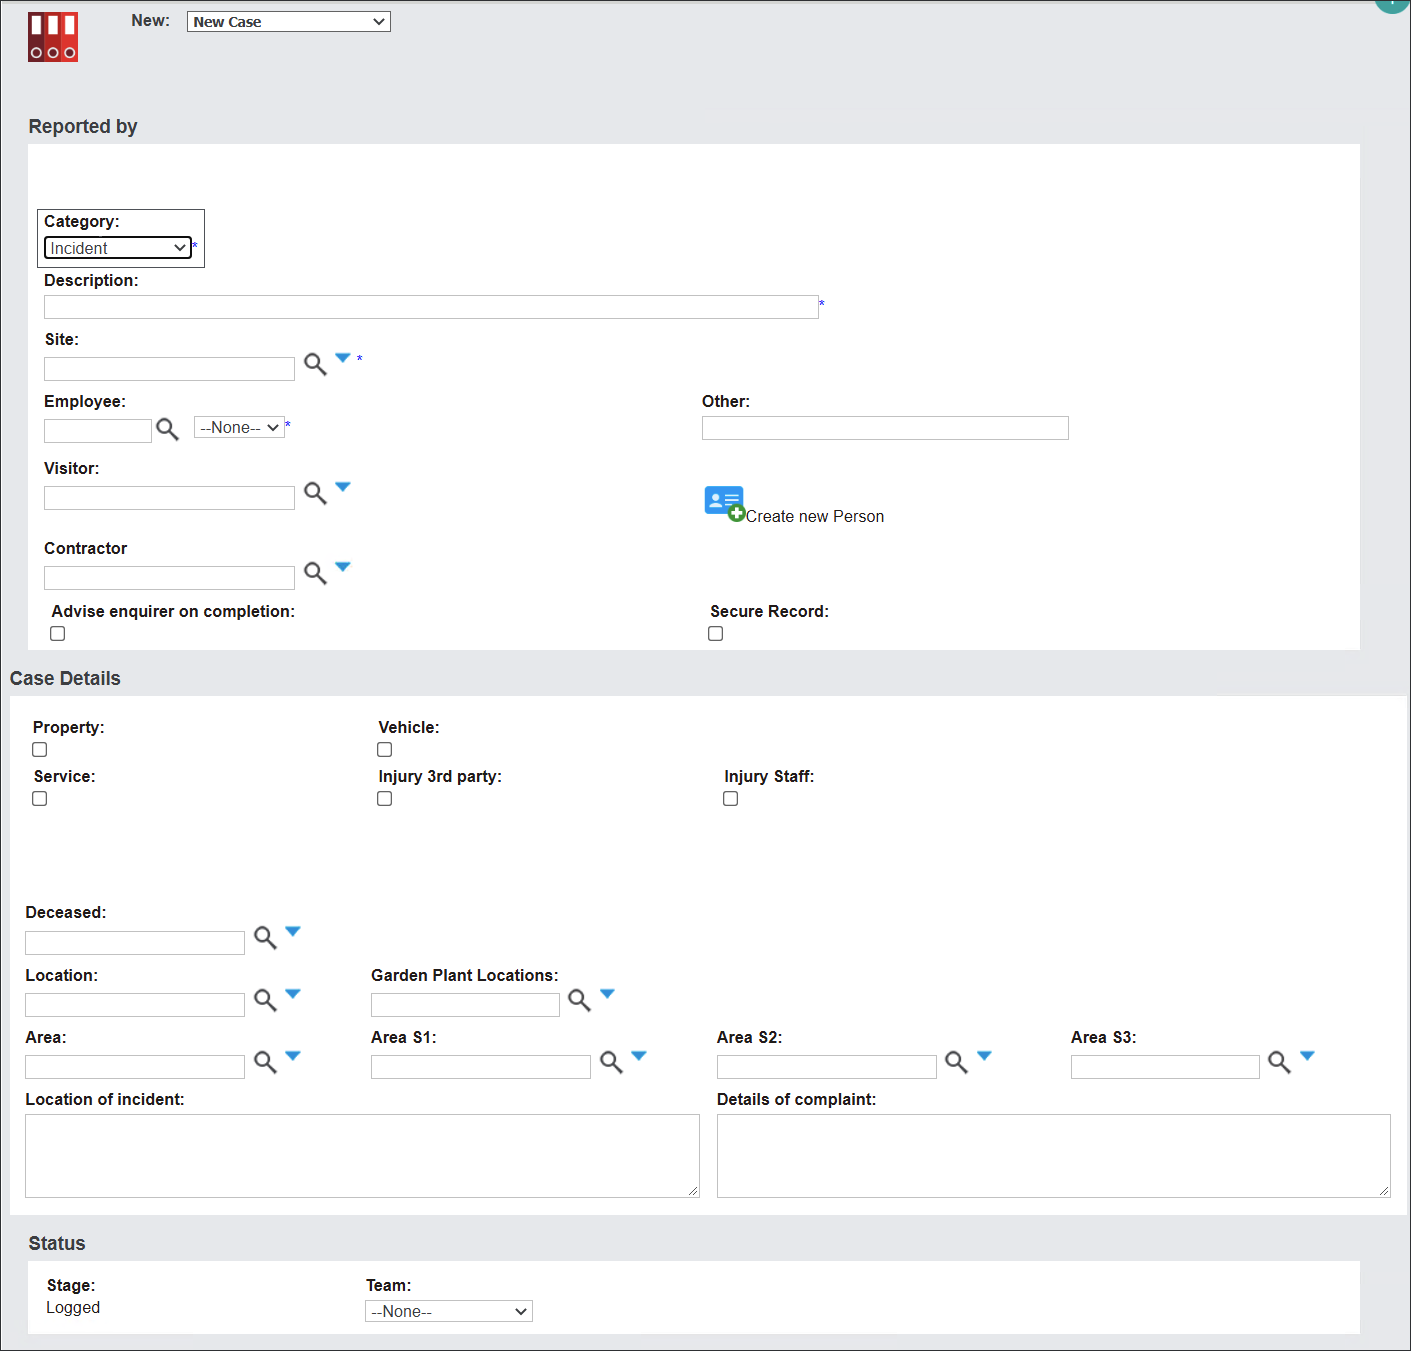
Begin creating the record by populating the fields in the Reported By section, which follows the same pattern as Client Feedback and Works Request records.
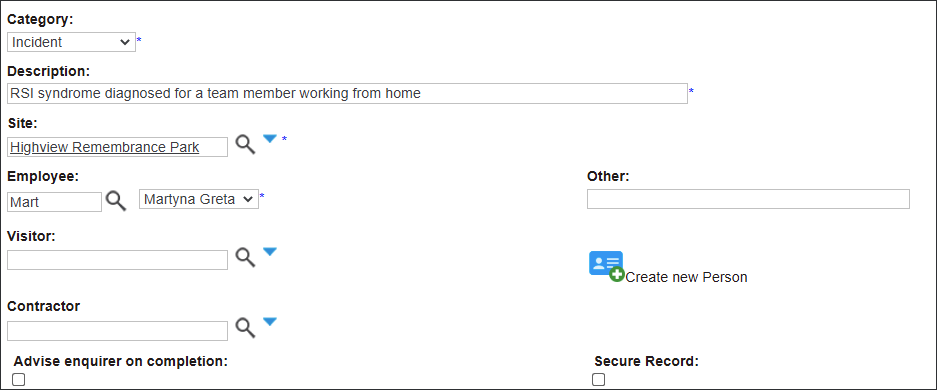
In the Description field type in a brief description of the request.
From the Site menu select the name of the site where the works need to happen.
In the Employee field type in or press the magnifying glass icon and select the user’s name who logs the request.
If the request was reported not by a site employee, for example a contractor, type in the person's name in the Other field.
There are two tick boxes which allow you to decide whether the feedback:
-
Requires follow up with the feedback enquirer - Advise enquirer on completion and\or
-
Is confidential and should be available only to certain users - Secure Record.
See these fields populated in an example below.
Navigate to the Case Details section.
The tick boxes Property, Vehicle, Service, Injury 3rd party and Injury Staff allow you to narrow down the area/s of concern.
Tick all relevant option/s.

Users can connect an Incident record with a Deceased, Location or Garden Plant Location records.
Enter the Deceased person record in the Deceased field to cross-reference the feedback, for example to a service or location.
If the Deceased record is connected to a location the system will auto-populate all related fields: Location, Area, Area S1 and Area S2.
In the example above, the Incident is related to the offsite environment rather than grounds or particular locations, so these fields remain blank.
Please, view the Create new Client Feedback section to see how to populate these fields when an Incident is related to a location e.g. occurred during a burial service.
The Location of incident and Details of complaint fields are text boxes narrowing down the description of the Incident.
Type in the information regarding the Incident.

Stage of a newly created Case is Logged.
This can be edited after the Case is created when the record goes through a workflow, for example for further investigation.
Note: See more details in the section Workflow Actions.
In the Assigned To field type in or press the magnifying glass icon and select the user’s name who will monitor the Case.
Cases can also be assigned to a team.
Click on the Team field and follow the same approach as outlined in the Assigned To field.

Press Save to secure the record.
The Incident record has been created.
However, unlike other records in byondpro, the system automatically navigates to the Incident Details tab prompting users to take immediate actions on the Case.
See more details on how to manage this tab in the Incident details section.
Take a look at the Summary screen of the newly created Incident.