Correction of Interment Records
The purpose of this section is to assist where an interment record has been captured against the incorrect location.
The steps below outline how to add the information to the correct location and add a new interment record to capture the data correctly. The process also explains how to make amendments to the location where the information has been captured incorrectly and clear the data from that interment record.
These steps apply to both burial interment records and cremated remains interment records. Depending on the type of interment record that is being corrected, there are some slight differences in relation to the data that needs to be transferred, however, the process is essentially the same.
For your reference we suggest having the incorrect record open in byondpro and in an additional tab have the record where the information is to be captured correctly open.
We also recommend at the completion of the correction entries, notes are added to the Deceased record and the Location record /s to indicate the amendments that have taken place to these records.
1. Open the Incorrect Record
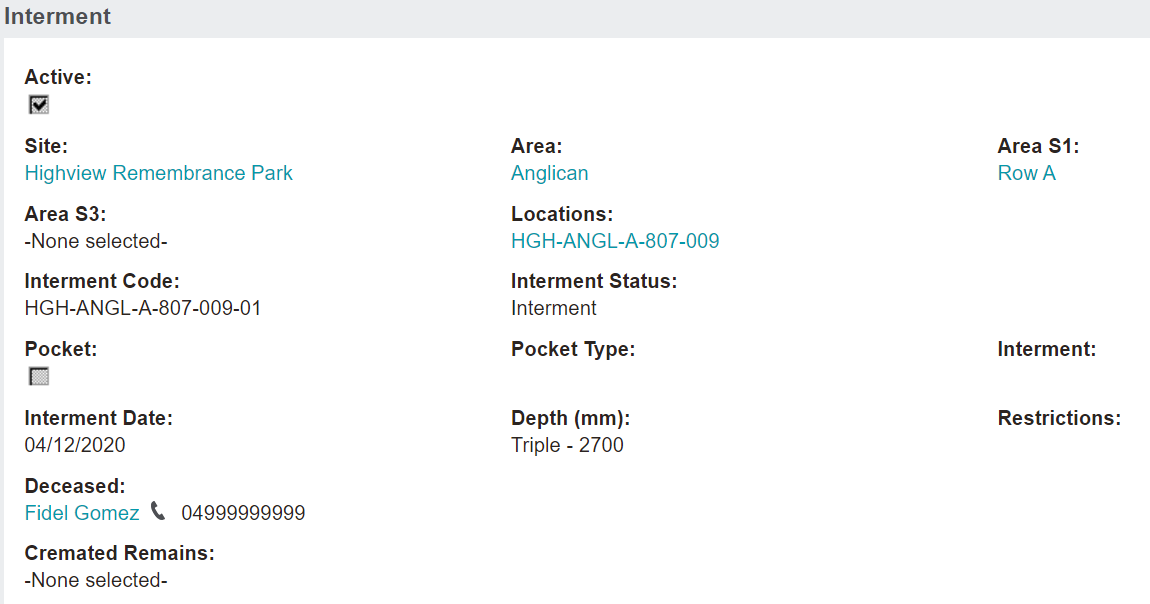
Navigate to the Interments tab of the Location record, where the information has been captured incorrectly.
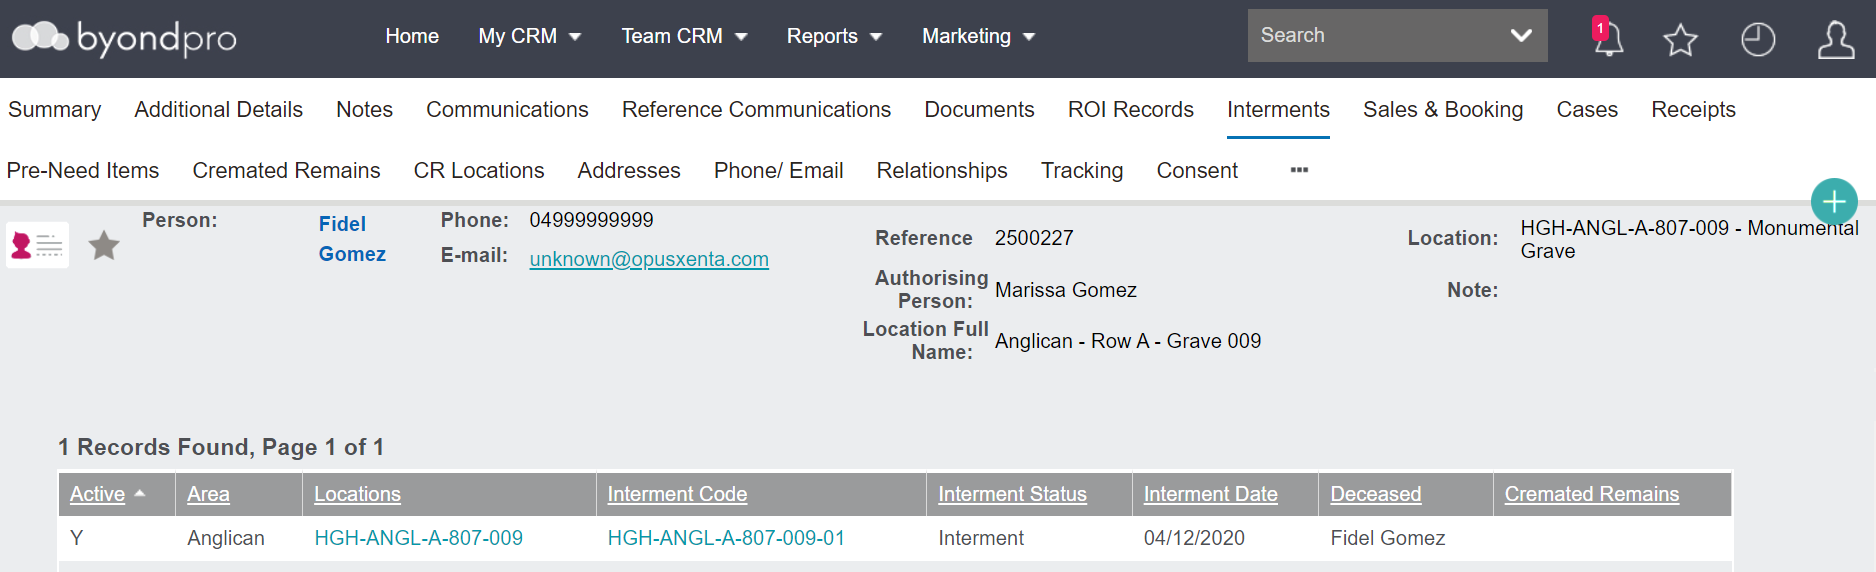
We started by searching for the Deceased record and looking at the Interments listing.
Our incorrect record for this example is HGH-ANGL-A-807-009.
Open the Interment record by clicking on the Interment code hyperlink.
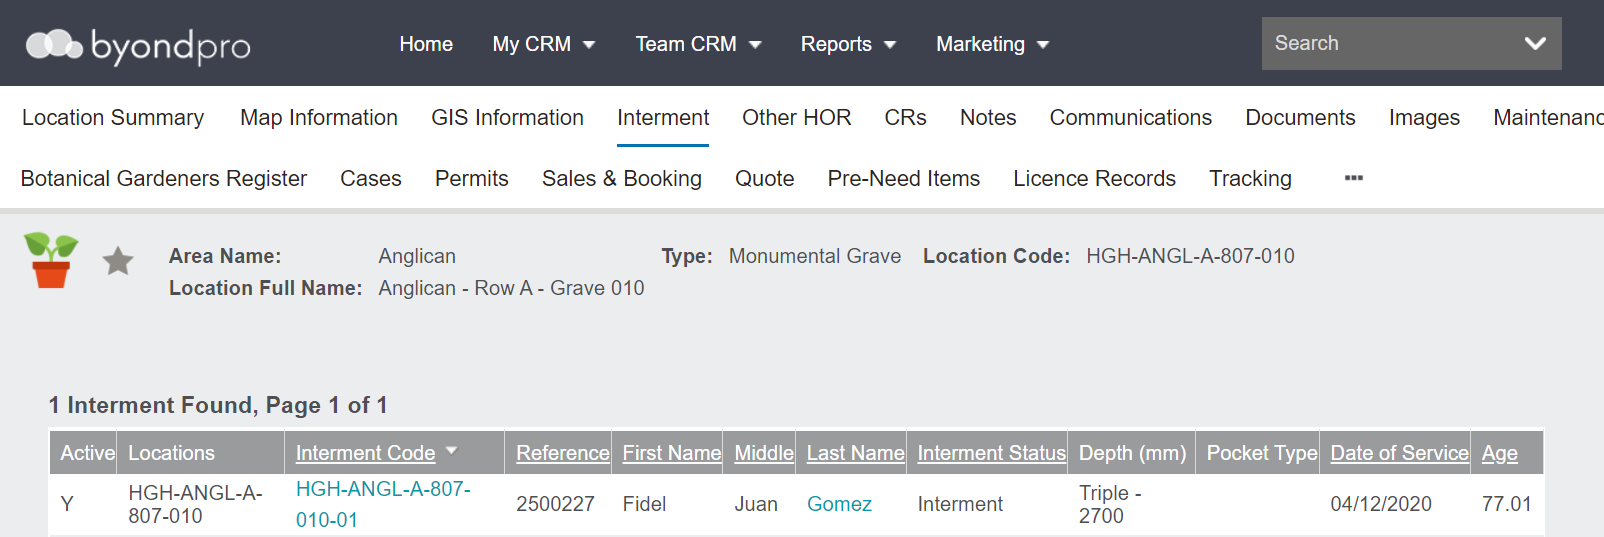
You could also start by searching for the Location record and then navigate to the Interment tab.
Open the Interment Record by clicking on the hyperlink as shown below.

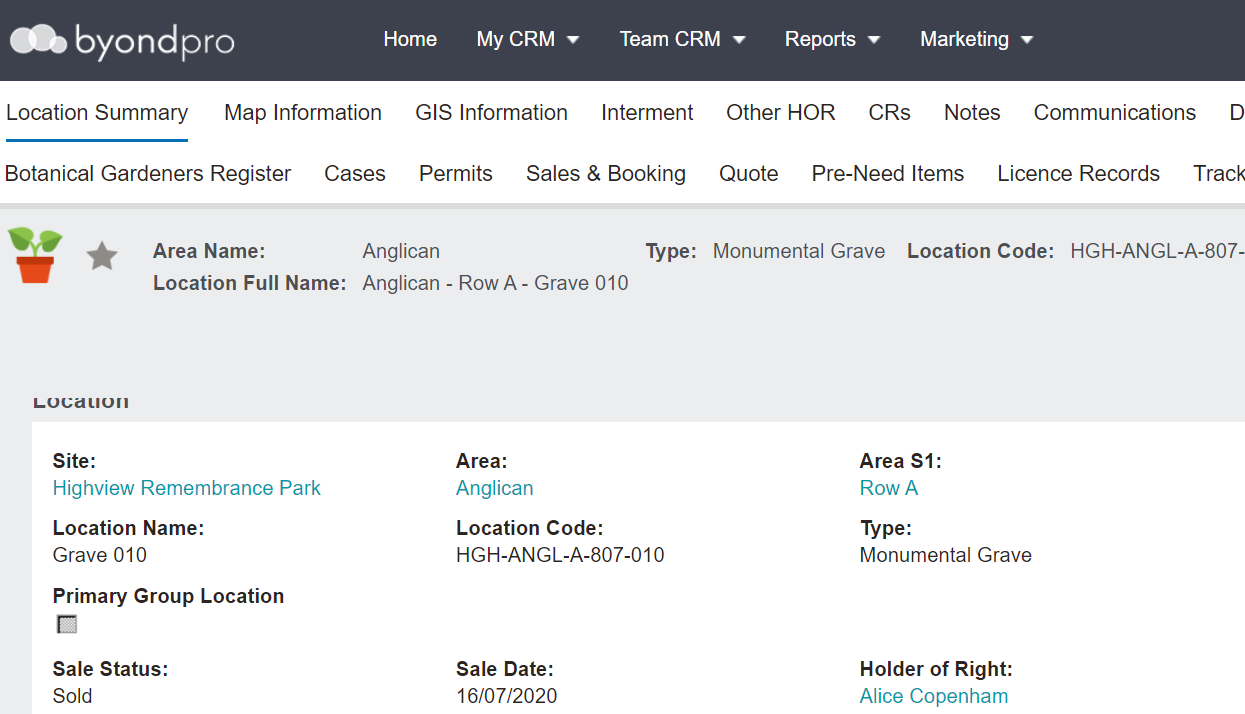
2. Open the Correct Record
In a separate tab open the correct location.
Our correct record for this example is HGH-ANGL-A-807-010
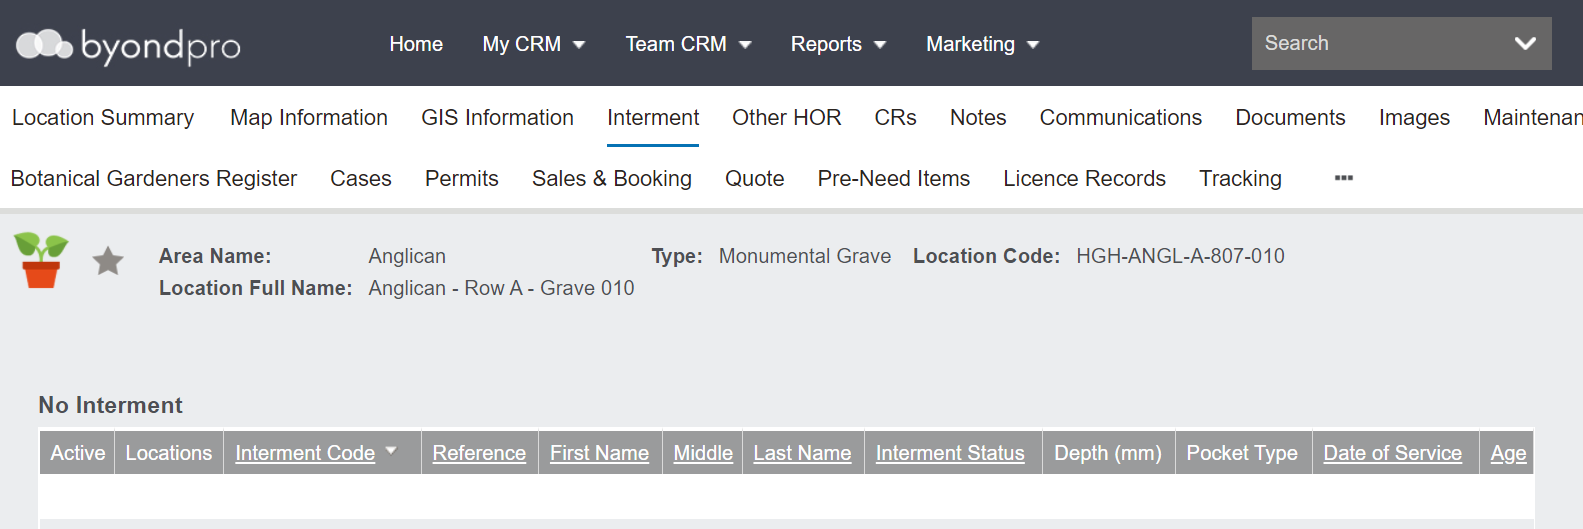
Navigate to the Interments tab.
If this is the first interment record on this location, there will be no records listed here. However, if this is an additional interment, you will see records displaying.
3. Update the information on the Correct Record First
First add the information to the correct record.
You can switch between tab headers to check values on the incorrect record; this helps to copy the data across accurately.
Choose the New button on the left of the screen on the Interment tab.
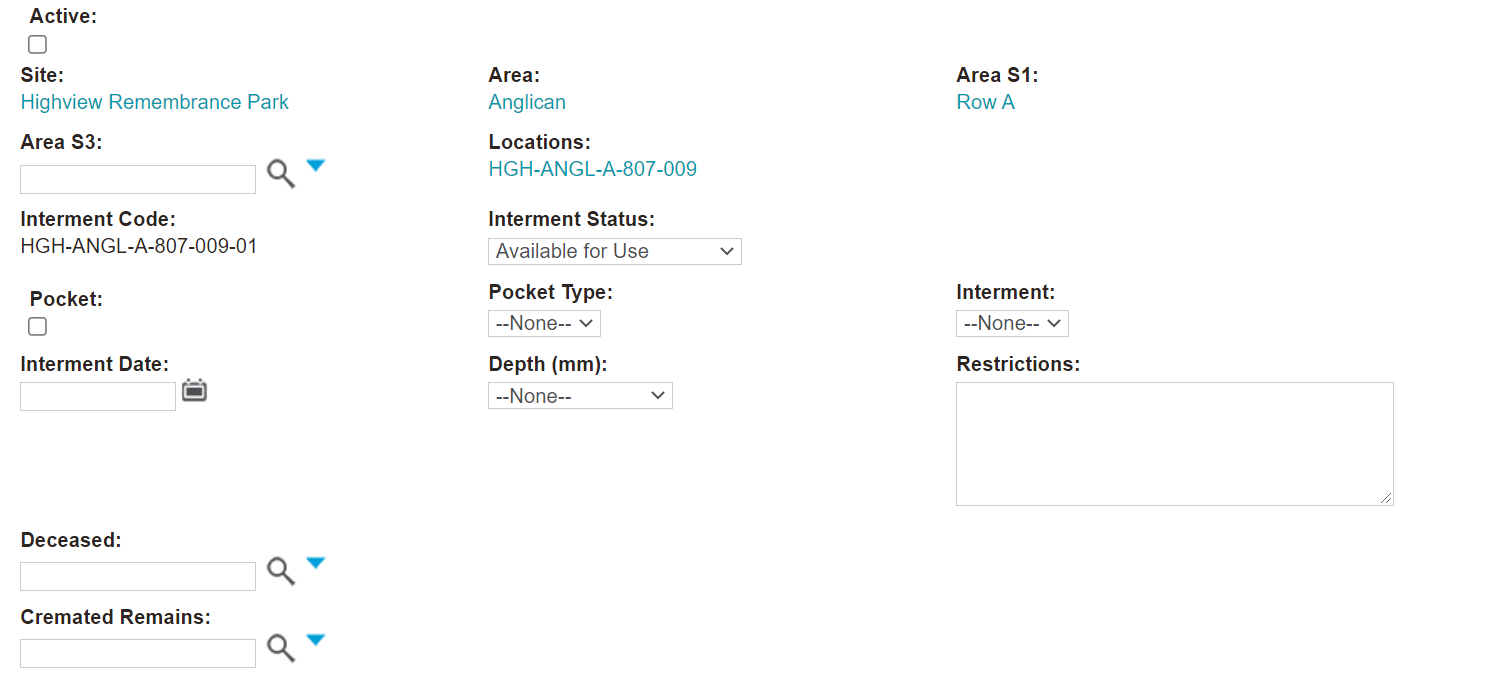
The screen below opens for you to transfer the data across.
Mirror the information from the incorrect record that is also opened at the top of the screen. You can toggle between the records to capture the data.
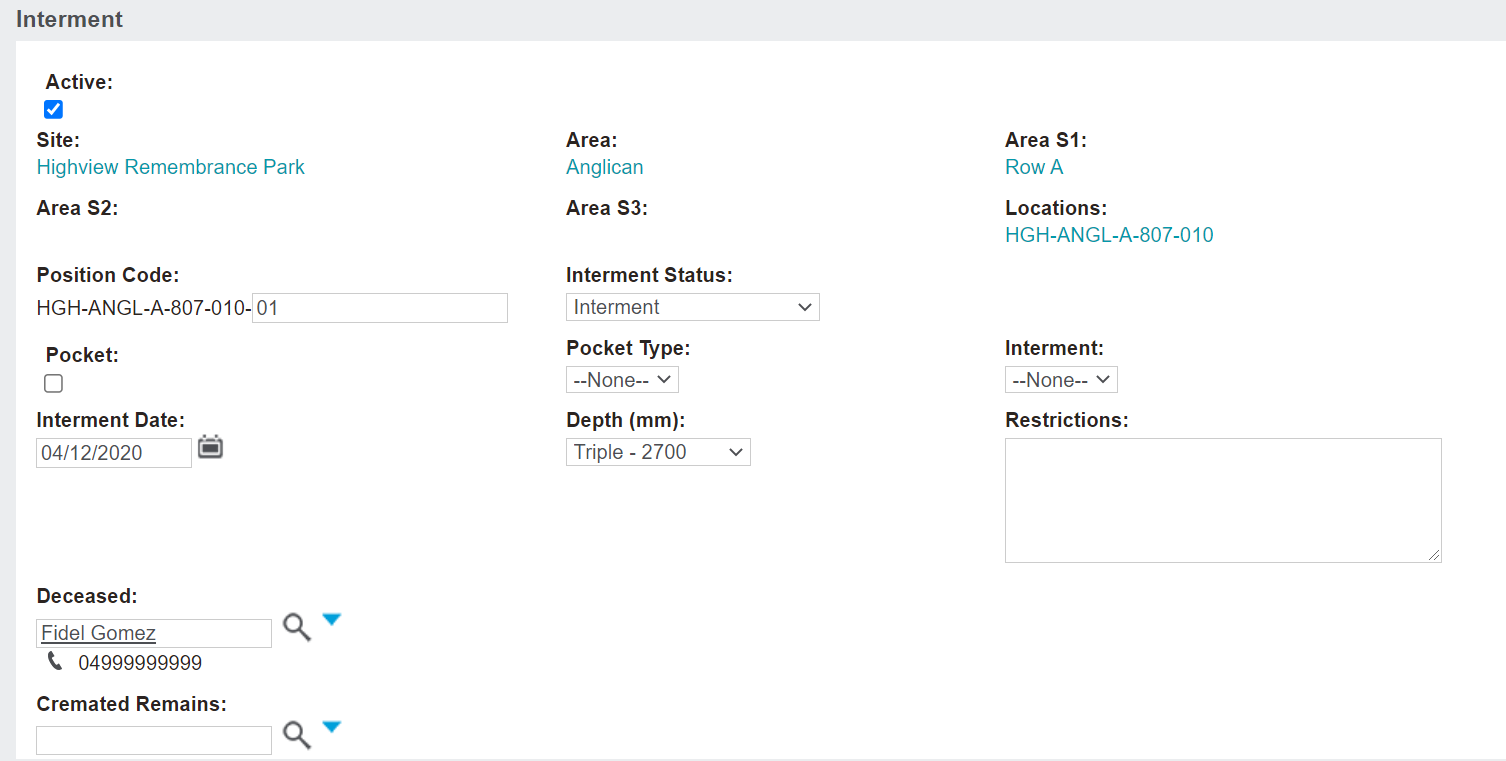
Enter the Position Code / Interment Code, e.g., 01 or as it appears on the incorrect record
-
If this is not the first interment record, enter the next position code, 02, 03 etc.,
In the Interment Status field, choose ‘Interment’ from the selection list.
Where the record relates to cremated remains (note our screen shot example above relates to a burial location).
-
Tick the pocket tick box
-
Select the Pocket Type
-
Choose the applicable Interment option from the drop-down selection.
Enter the Interment Date.
For a burial location, enter the Depth.
Notate any restrictions
Enter the Deceased record and choose the magnifying glass to lock in the record.
If the record being amended is for a cremated remains interment, enter the Cremated Remains record number and choose the magnifying glass to lock in the record.
Choose Save.
The interment details are now captured on the correct record.
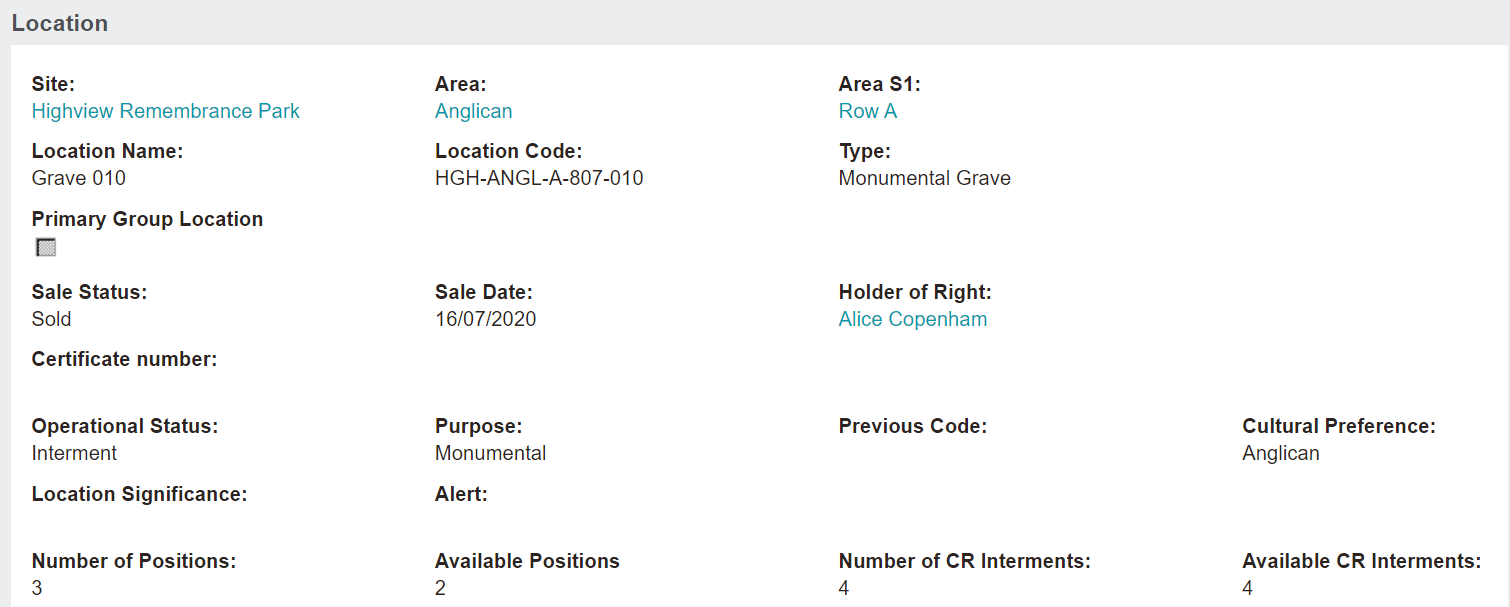
4. Update the Location Summary
The location summary will automatically update the available positions or the available CR Interments.
If there has been no previous interment in the updated location, the location summary operational status will need to be updated too. The sale status and sale date may also need to be captured.
From the location summary screen choose the Change button on the right-hand side.
Update if applicable:
-
The Sale Status
-
Sale Date
-
Operational Status to Interment
Once completed, choose Save.
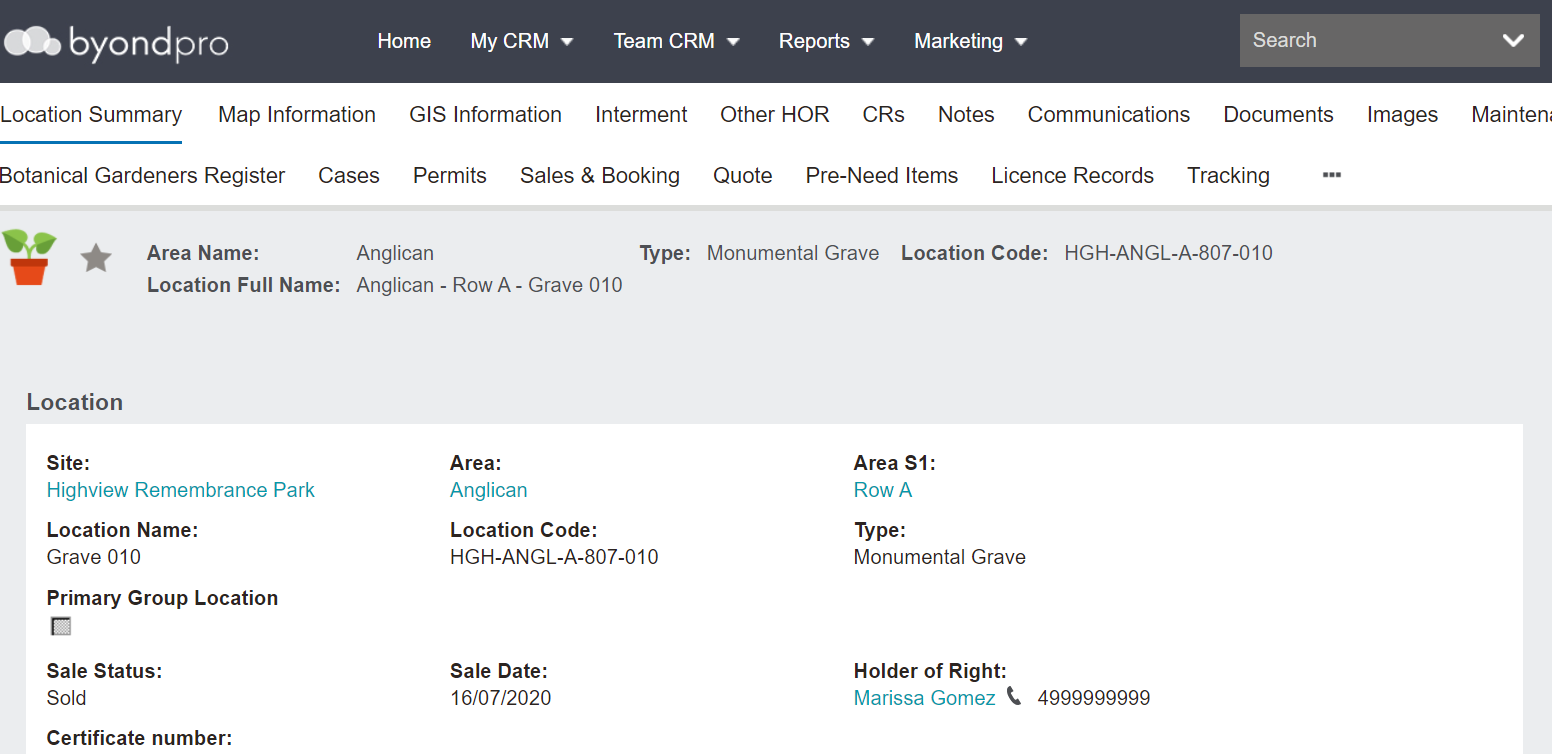
It is likely if this location was not previously marked as sold that the holder of right record will not have been updated either.
Choose the Change Holder of Right button on the right-hand side of the screen.
Populate the Holder of Right and click the magnifying glass to lock in the record.
Choose Save.
5. Update / Clear the Information on the Incorrect Record
Now to clear the information from the incorrect record.
Back on the Interments tab of the incorrect record, choose the interment code and select the Change button from the right-hand side of the screen.
Untick the Active box to show this is no longer an active record.
Change the Interment Status to ‘Available for Use’
Where the record relates to cremated remains (note our example relates to a burial location). Where applicable:
-
Clear the Pocket tick box
-
Change the pocket type to ‘None’
-
Change the Interment selection to ‘None’
Clear the Interment Date.
Change the Depth to ‘None.'
Delete any Restrictions.
Clear the Deceased Name .
Clear Cremated Remains Reference.
Once completed, Save the record.
The Interment record / code will remain on the Location record showing an interment status of Available for Use.
The Number of Positions or Number of CR Interments will have increased to show the interment record is no longer recorded.
If the sales values on the Location summary do not apply, select change and clear any / all of:
-
Sale Date, Sale Status (available for sale), Operational Status (available for use)
-
Certificate (deed / licence) number
-
Tenure expiry date, Tenure status (none)
To set the Holder of Right of Interment to blank, select the Change Holder of Right button. Remove the existing name and save.
The Tracking tab will capture these field changes, however, we suggest that you enter personalised notes about the changes to the record, for future reference. Depending on your preference, you might add these as general Notes or Communications.
Navigate to the notes tab on the Location and capture the details about the amendments made on the correct location record and the incorrect location record for reference purposes.
These notes can be added as a ‘General’ note type.

Navigate to the notes tab on the Person record and notate the amendments that have been made to the interment records.
These notes can be added as a ‘General’ note type.
